
With the release of vSphere 7.0 U2, VMware introduced support of Avi Load Balancer (NSX Advanced Load Balancer) for vSphere with Tanzu, and thus, fully supported load balancing is now enabled for Kubernetes. Before vSphere 7.0 U2, HA Proxy was the only supported load balancer when vSphere with Tanzu needed to be deployed on vSphere Distributed Switch (vDS) based networking.
HA Proxy was not supported for production-ready workloads due to its own limitations. NSX ALB is a next-generation load balancing solution, and its integration with vSphere with Tanzu enables customers to run production workloads in the Kubernetes cluster.
When vSphere with Tanzu is enabled using NSX ALB, the Controller VM has access to the Supervisor Cluster, Tanzu Kubernetes Grid clusters, and the applications/services deployed in the TKG Cluster.
The diagram below shows the high-level topology of NSX ALB & vSphere with Tanzu.

In this post, I will cover the steps of deploying & configuring NSX ALB for vSphere with Tanzu.
NSX ALB Deployment Prerequisites
- Download the NSX ALB (Avi Network) installer from here
- Review Avi Networks official docs from here
- Review VMware official docs from here
Networking Pre-requisites
For a production setup, you need 3 subnets:
- One for the Avi Controller/SE management. The supervisor cluster will also connect to this network.
- One for Avi SE VIP for load balancing virtual services that get created when vSphere with Tanzu is deployed.
- One for the applications/services that will be deployed on top of the TKG cluster.
This is what my lab topology looks like.

In my lab, I am having the following subnets/IP pools configured.

NSX ALB Deployment
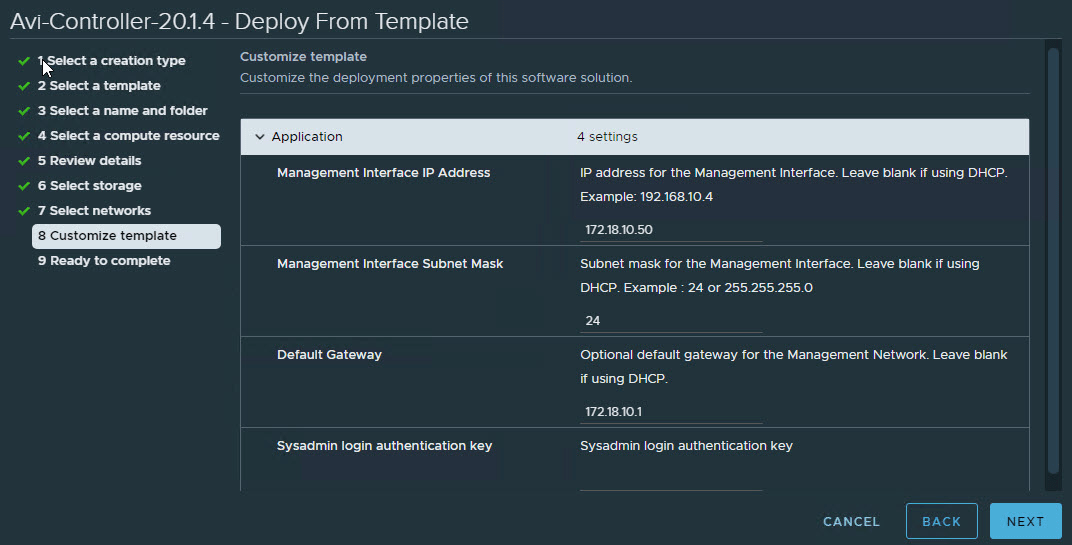
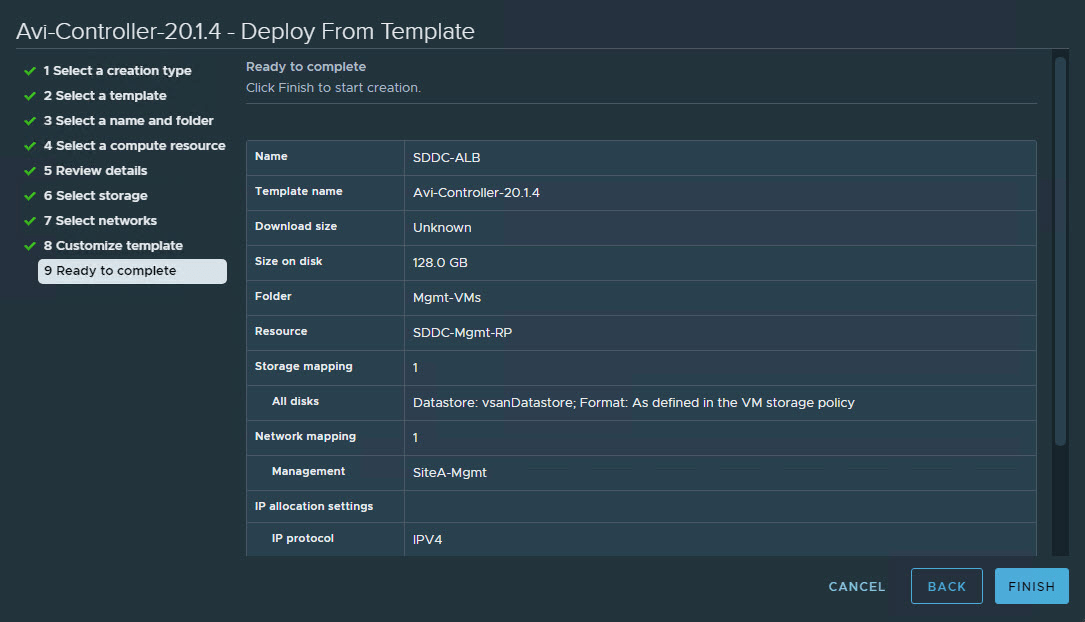
Once you have downloaded the Avi Controller OVA, deploy it using the standard VMware OVA deployment procedure.
Deployment is pretty simple. You need to punch in the details of the management port group/IP address.
Once the OVA is deployed and the Controller VM boots up, access the UI by typing https://<avi-controller-fqdn>/
Configure a password and email account for the admin user and click Create Account.

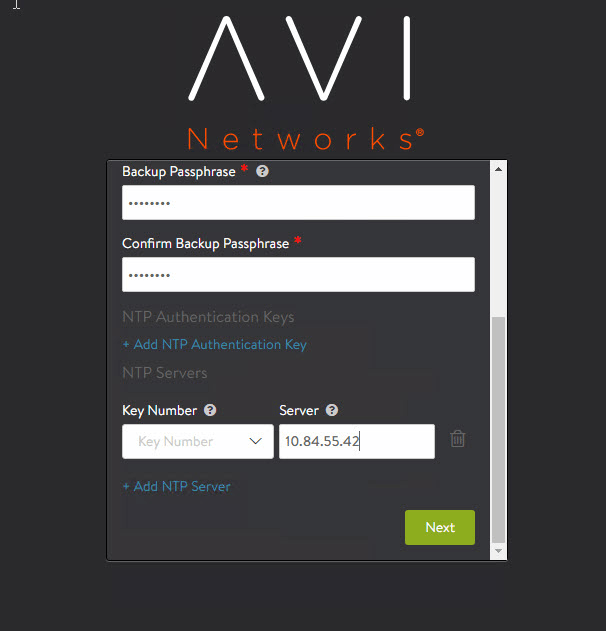
Provide DNS Servers, DNS Search Domain, and Backup Passphrase for the controller VM.
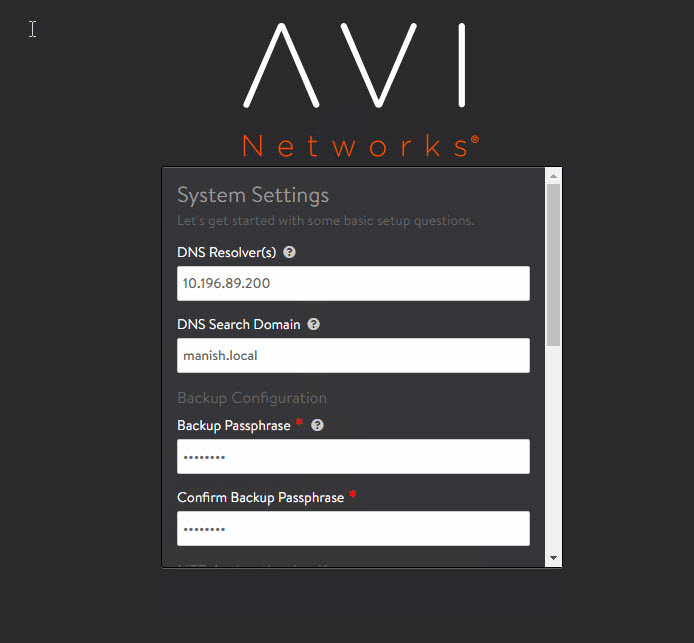
Scroll down on the same page to enter NTP details. Hit Next to continue.
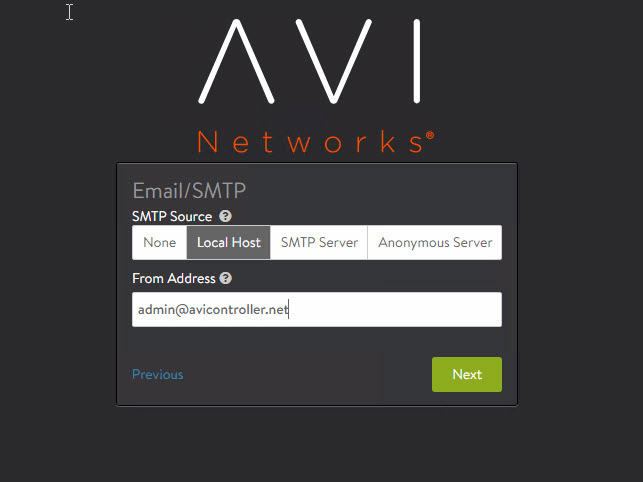
If you have an email server in your environment, enter the server details and hit next. For Lab/POC, it can be left as the default, as shown in the screenshot below.
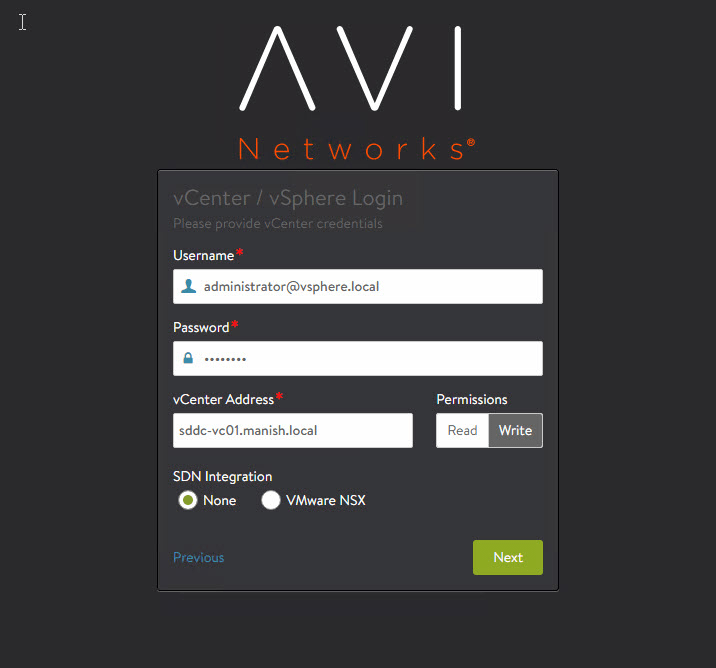
Select VMware as the orchestrator.

- Provide the vCenter Server information. This is the vCenter where vSphere with Tanzu will be deployed.
- Make sure Avi Controller gets write access to VC by toggling the Permissions button.
- Select None for SDN Integration.
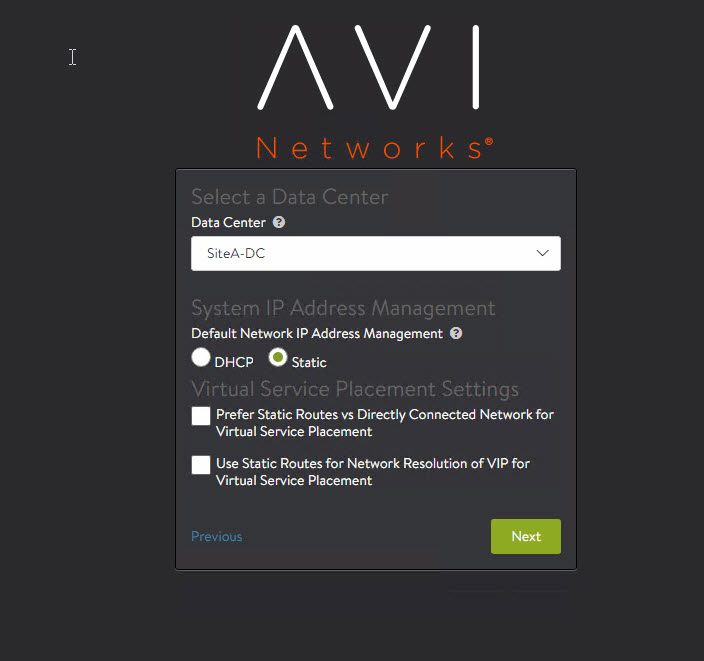
Select the Datacenter where Avi Service Engines will be deployed.
For Service Engine management IP addresses, I prefer static IPs. You can select DHCP if you have a DHCP server running on your management network.
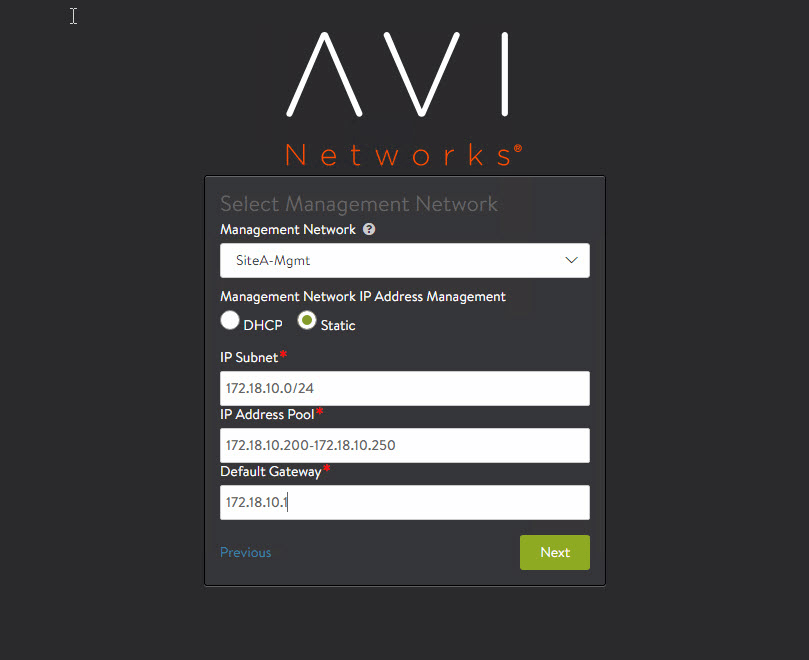
Select the management network port group and specify IP address details. Configure an IP address pool, which will be consumed by Service Engines when virtual services are configured.
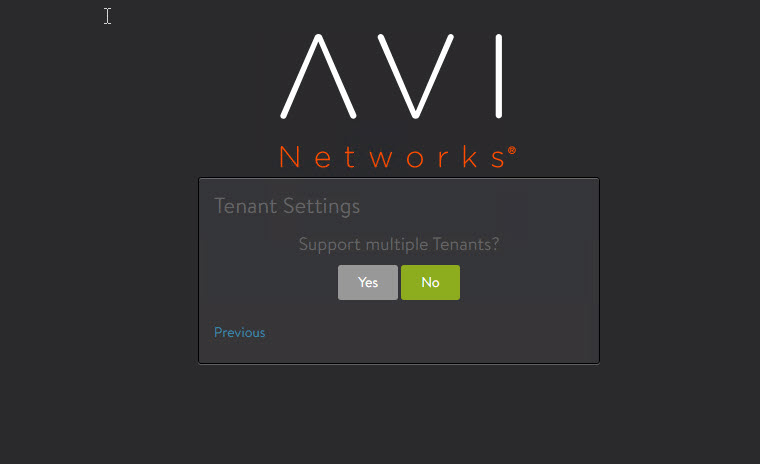
Select No for multi-tenancy.
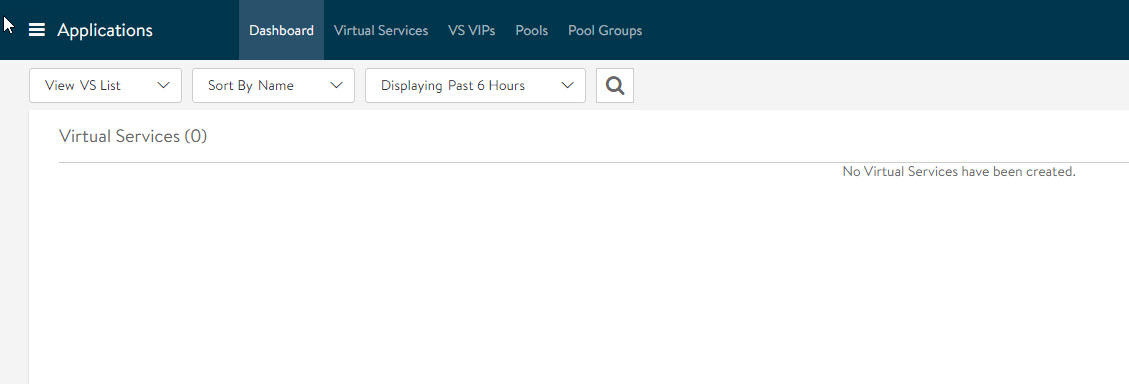
And that’s it for the initial configuration. You will be redirected to the Applications Dashboard page.
NSX ALB Configuration
Assign Avi Controller License
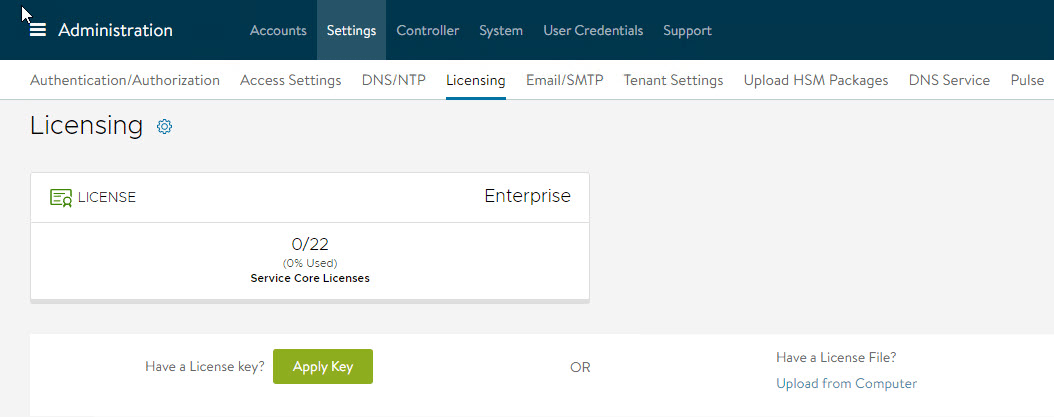
If you have an Avi license, you can assign it by navigating to the Administration > Settings > Licensing page and clicking the Apply Key.
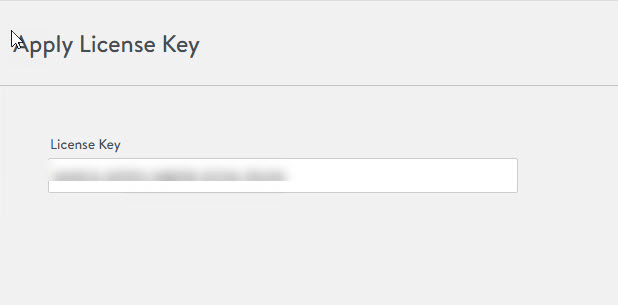
Punch in your license key and hit save.
Configure the IPAM and DNS Profiles
IPAM and DNS profiles are configured so that the Service Engines have visibility into which IP pool and DNS configuration to use.
IPAM/DNS profiles are created under Templates > Profiles > IPAM/DNS Profiles.
First, let’s create an IPAM profile.

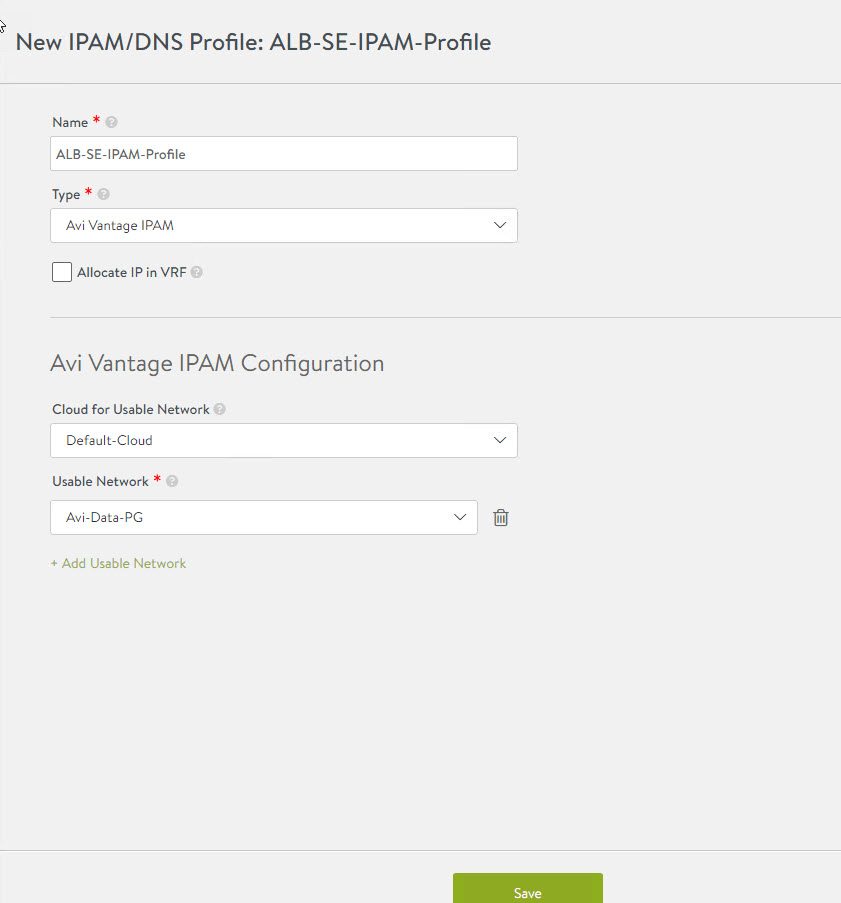
- Provide a name for the profile and select the type as Avi Vantage IPAM.
- Select the cloud for which we are creating the IPAM profile and choose the network that will be used by the Avi Service Engine datapath.
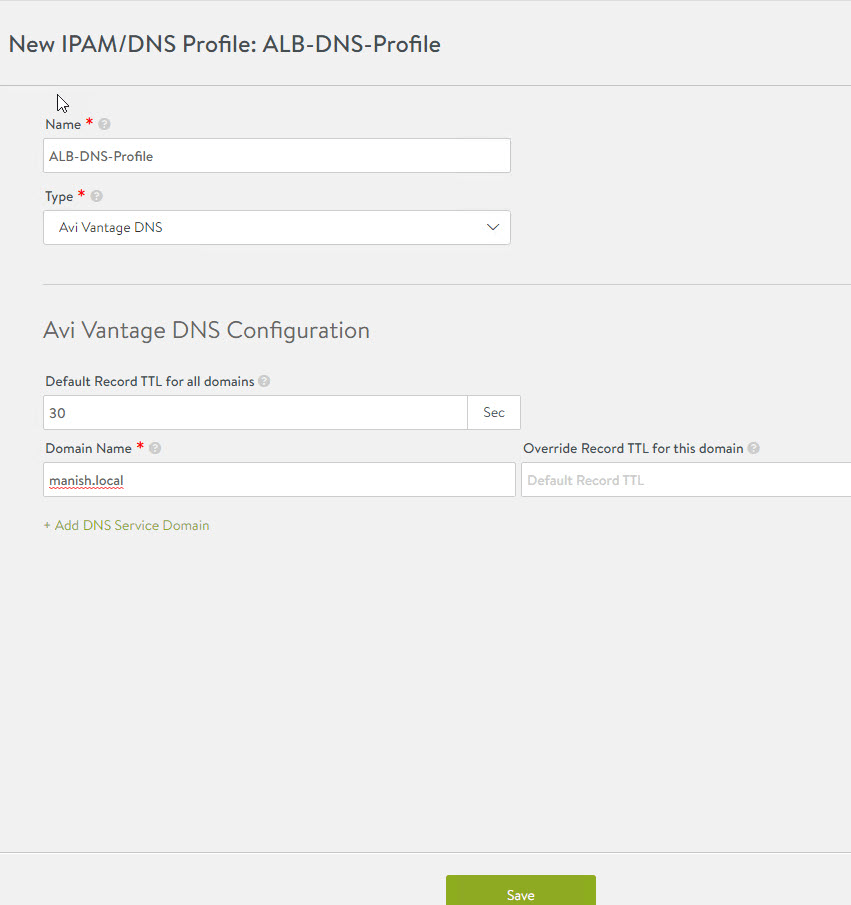
Similarly, create a DNS profile and enter your domain name in the profile. You can leave other values to default.
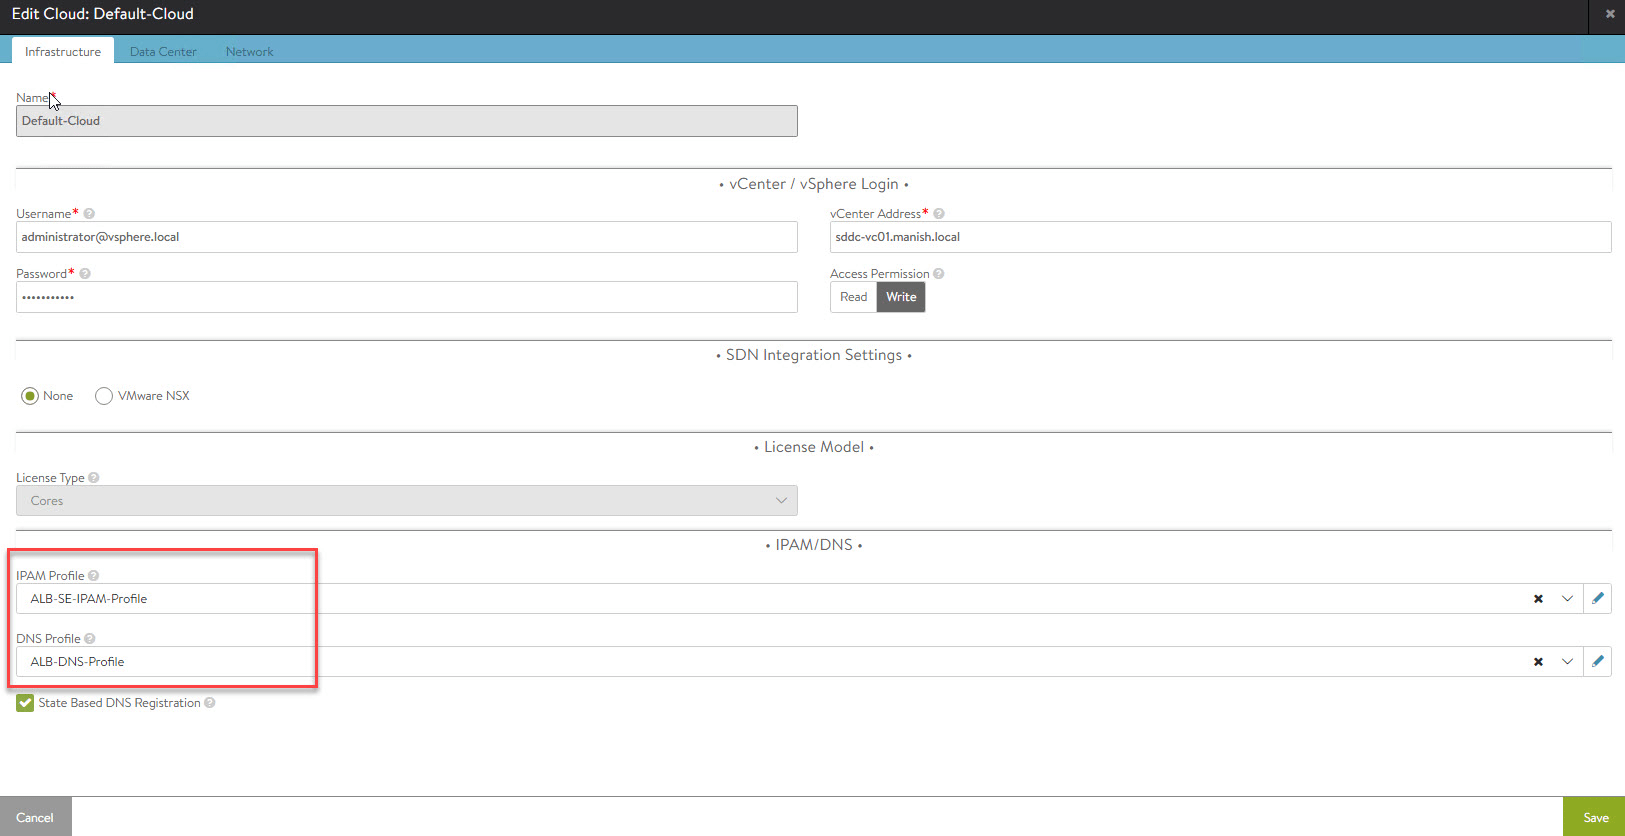
Associate the newly created IPAM/DNS profile with the default cloud (vCenter) by navigating to Infrastructure > Clouds and editing the default cloud.

Under the IPAM/DNS profile, select the profile that we created earlier and hit Save.
Configure Controller Certificate
The default certificate that gets created when Avi Controller is deployed doesn’t have the hostname/FQDN of the controller node. So we need to replace the default certificate with either a self-signed cert or a CA-signed cert.
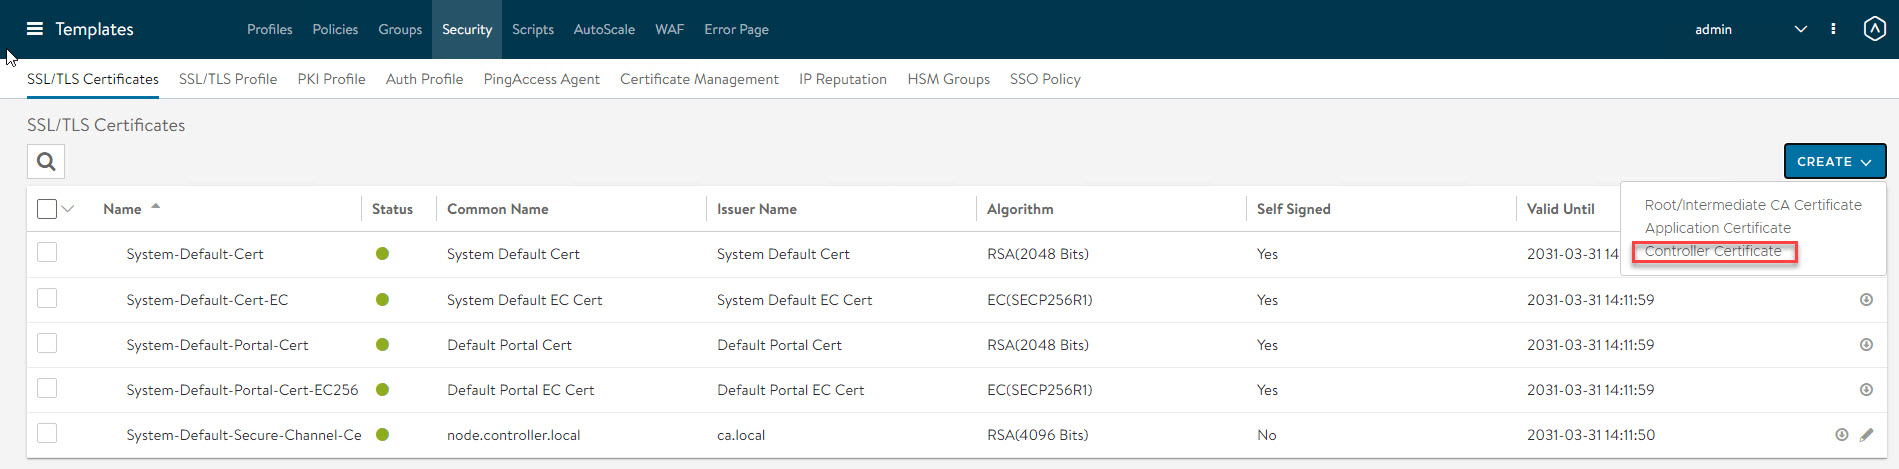
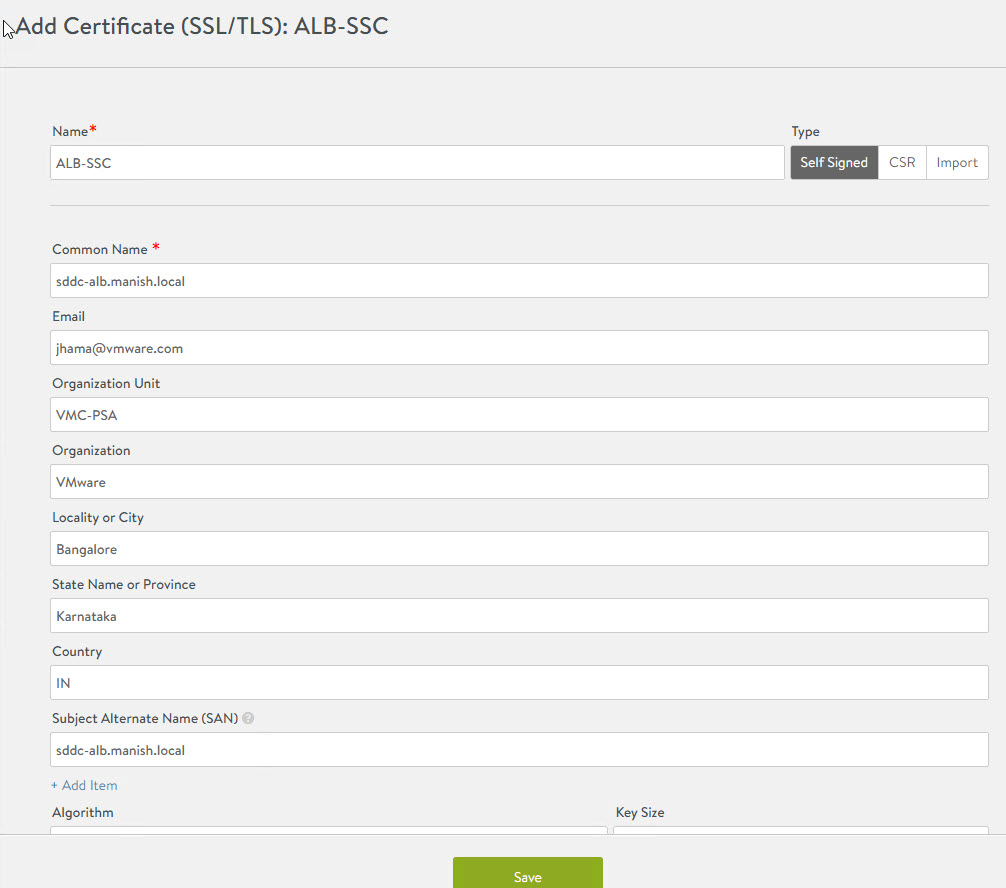
To create a self-signed certificate for the controller node, navigate to Templates > Security > SSL/TLS Certificates and click on Create Controller Certificate.
Enter relevant details and hit Save.
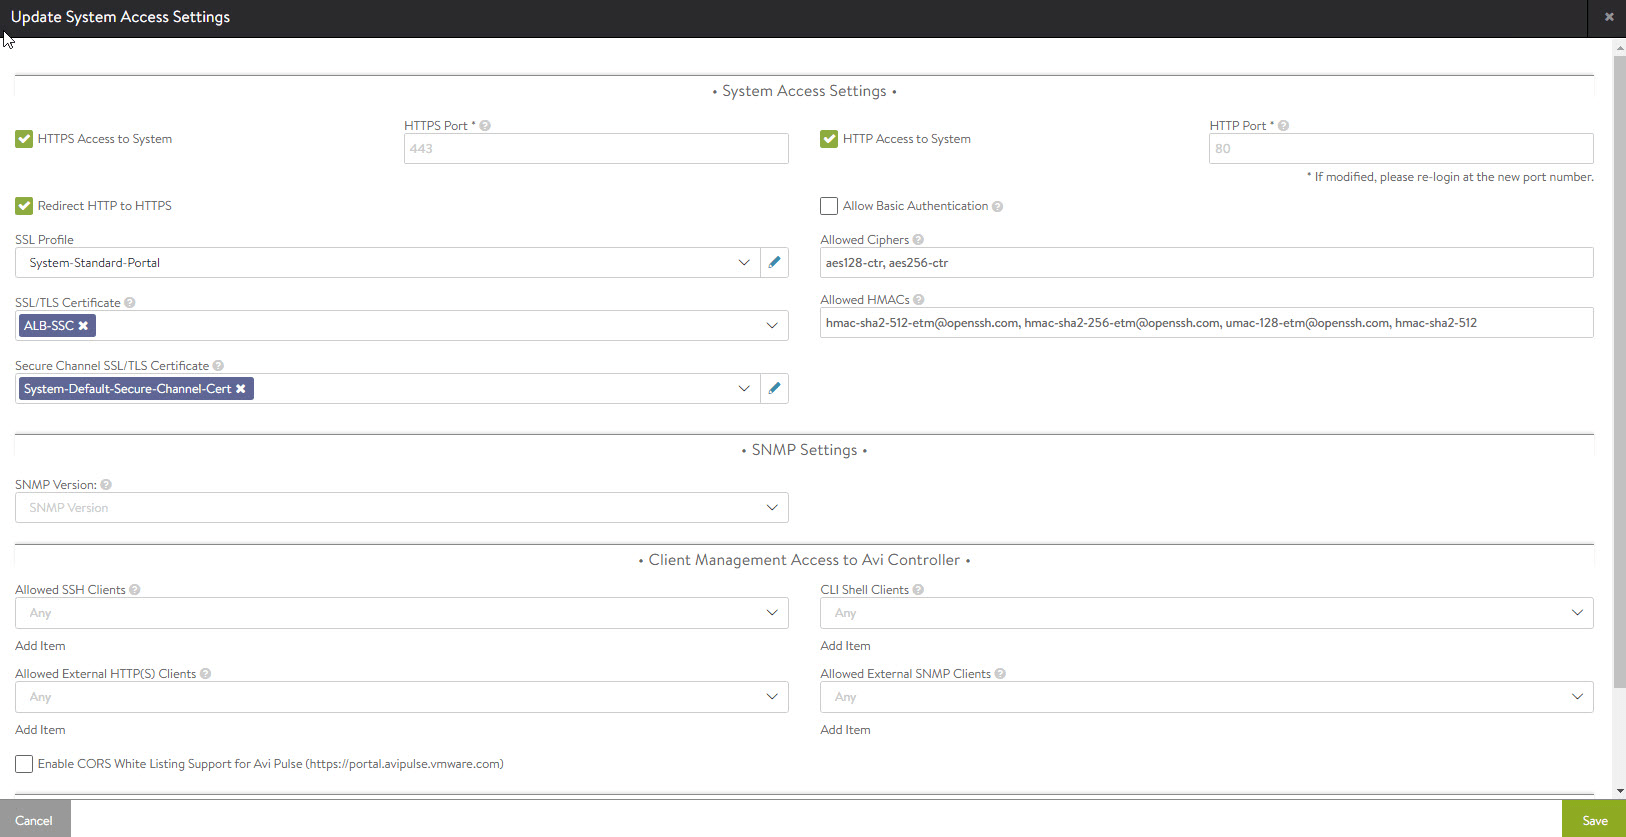
Once the certificate is created, we need to assign it to the controller node. This is done under Administration > Settings > Access Settings by clicking the Edit button.
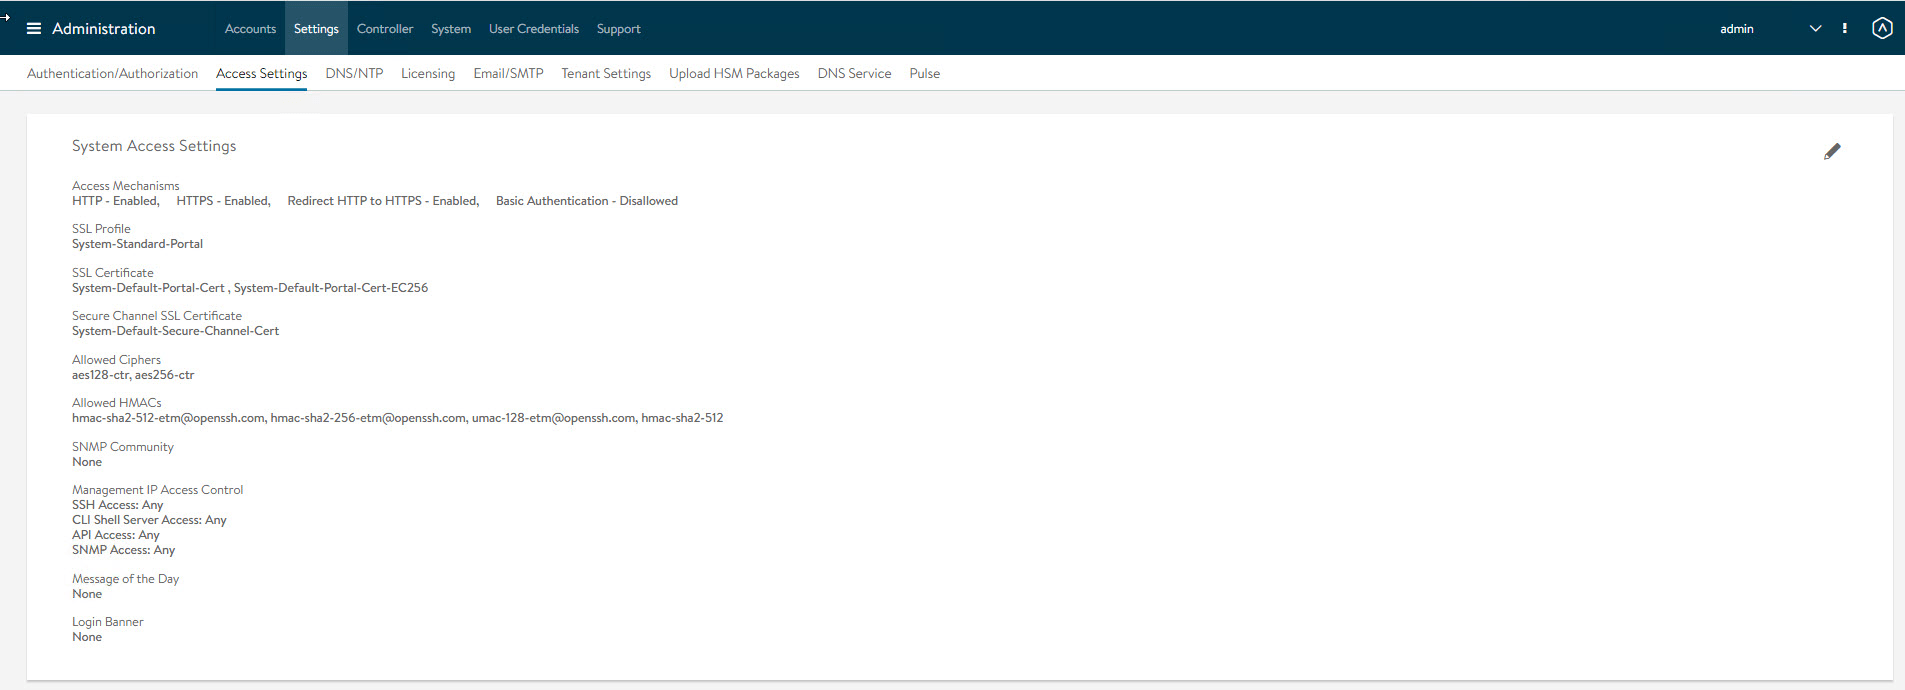
Remove the default certificates under SSL/TLS Certificate.

From the dropdown menu, select the certificate that you created in the previous step.
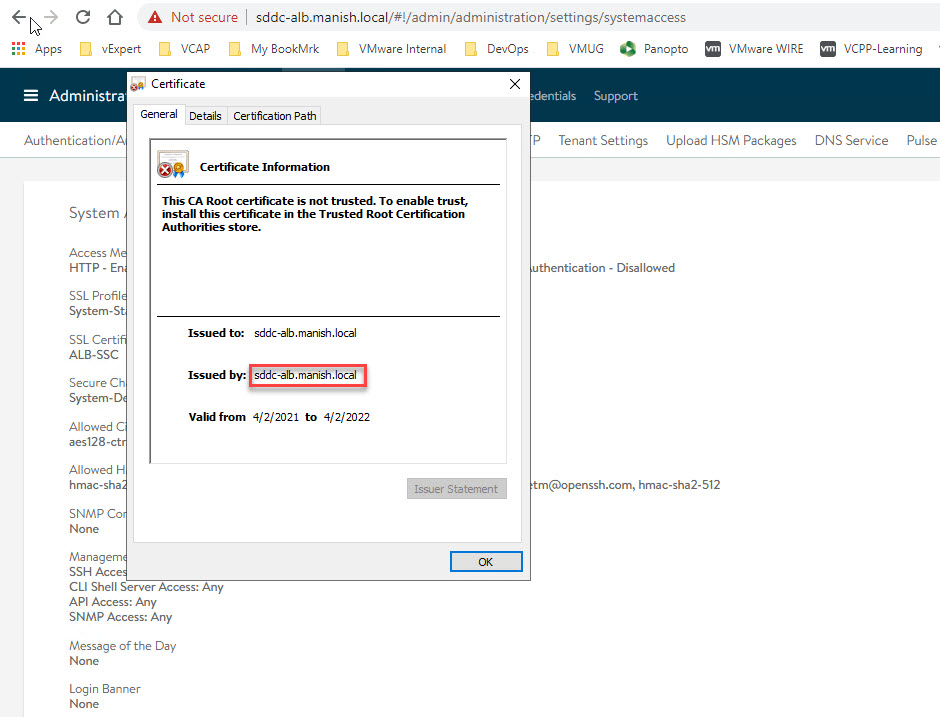
Refresh the web page to verify the newly minted controller certificate is now configured.
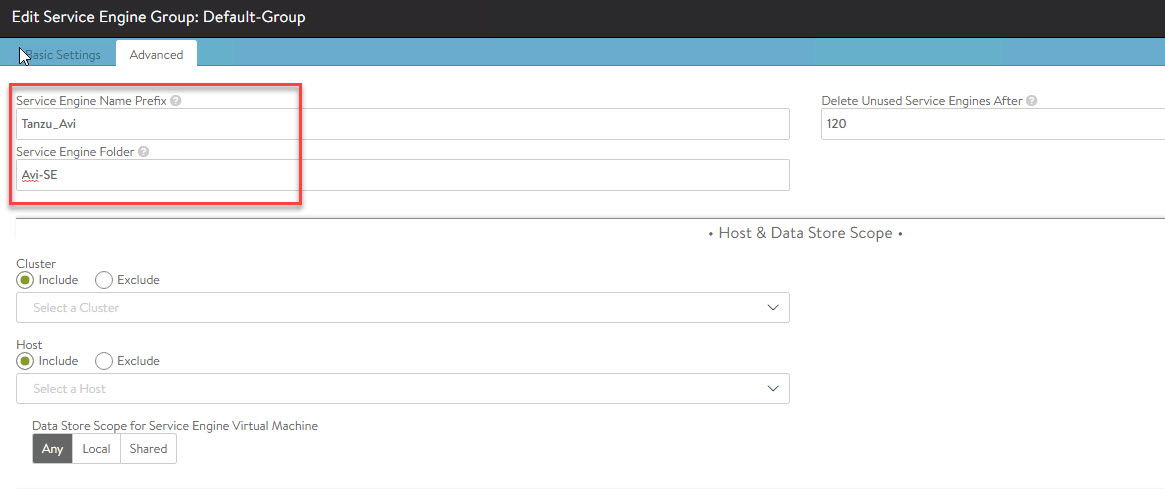
Configure a Service Engine Group
You can control SE’s placement and resource allocation by configuring a Service Engine Group.
To create/edit an SE group, navigate to Infrastructure -> Service Engine Group and edit the Default Group.

Navigate to the Advanced tab and specify the SE prefix and folder where SEs will be placed post-deployment.
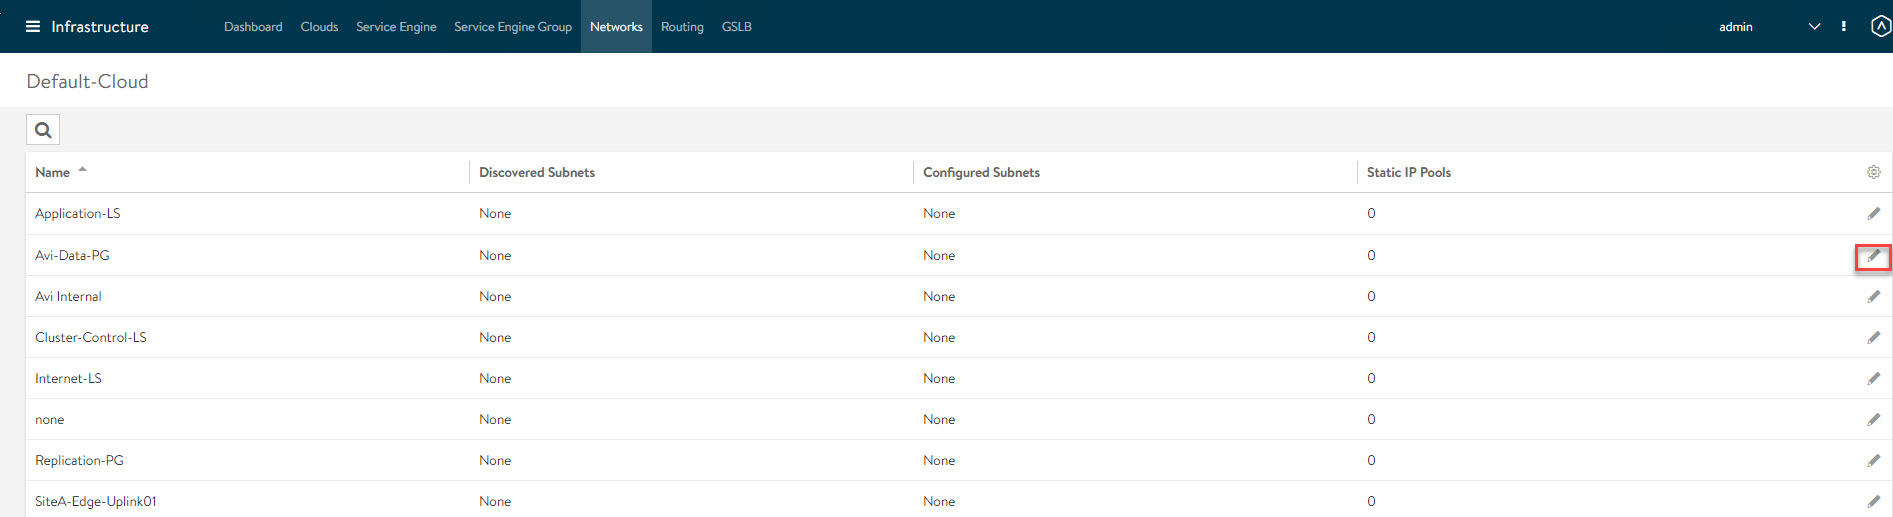
Configure Service Engine Virtual IP Network
We need to define an IP pool for the Service Engine VMs so that VIPs can be assigned to SE VMs when virtual services are created.
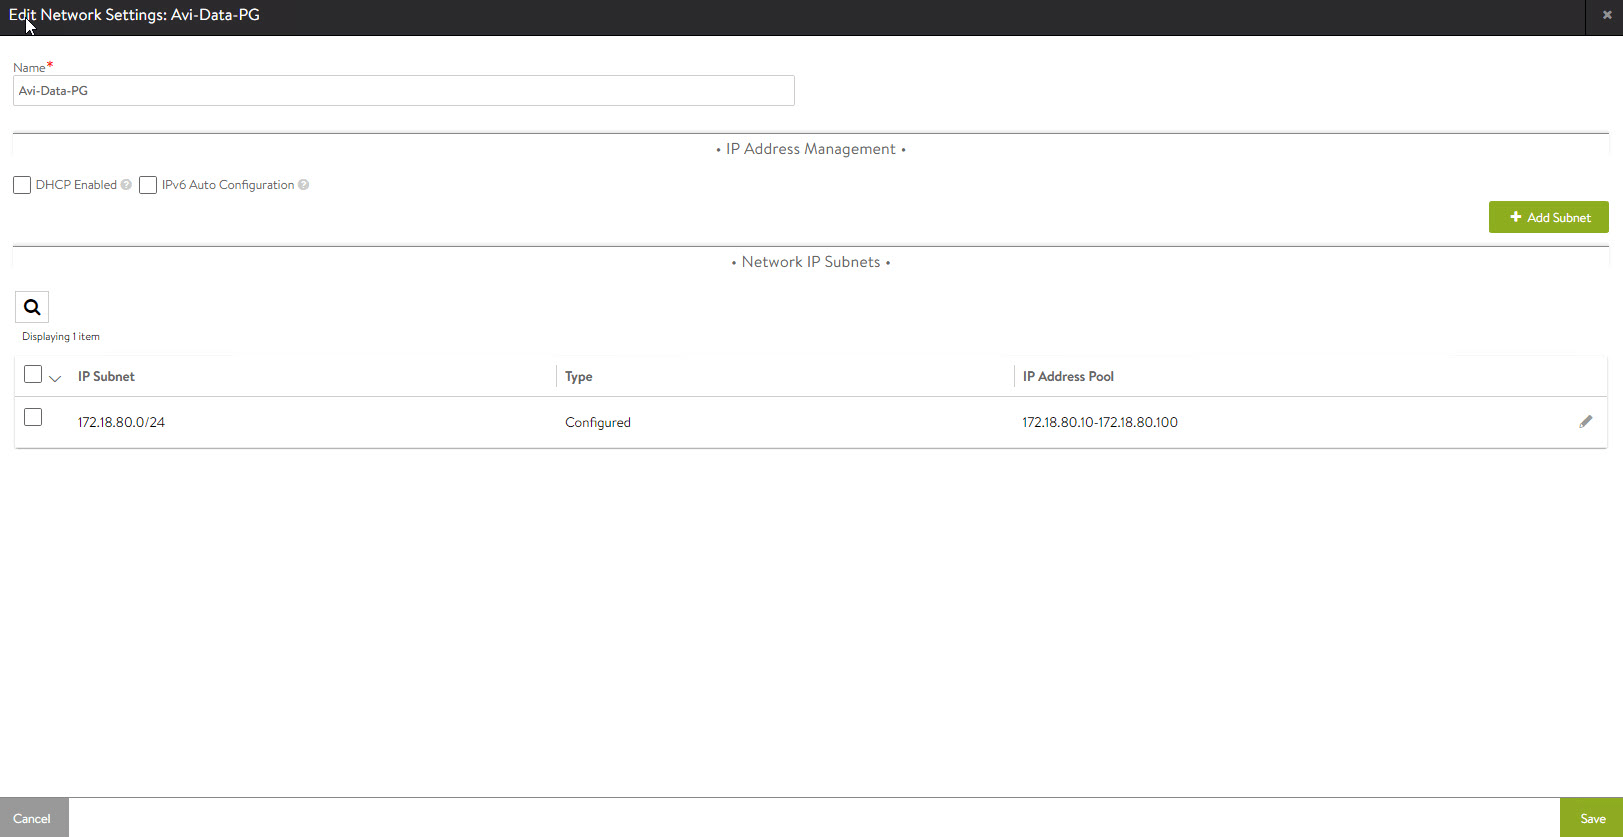
To specify a VIP pool, navigate to Infrastructure > Networks and edit the port group that you have created for Avi SE VIP/Datapath.
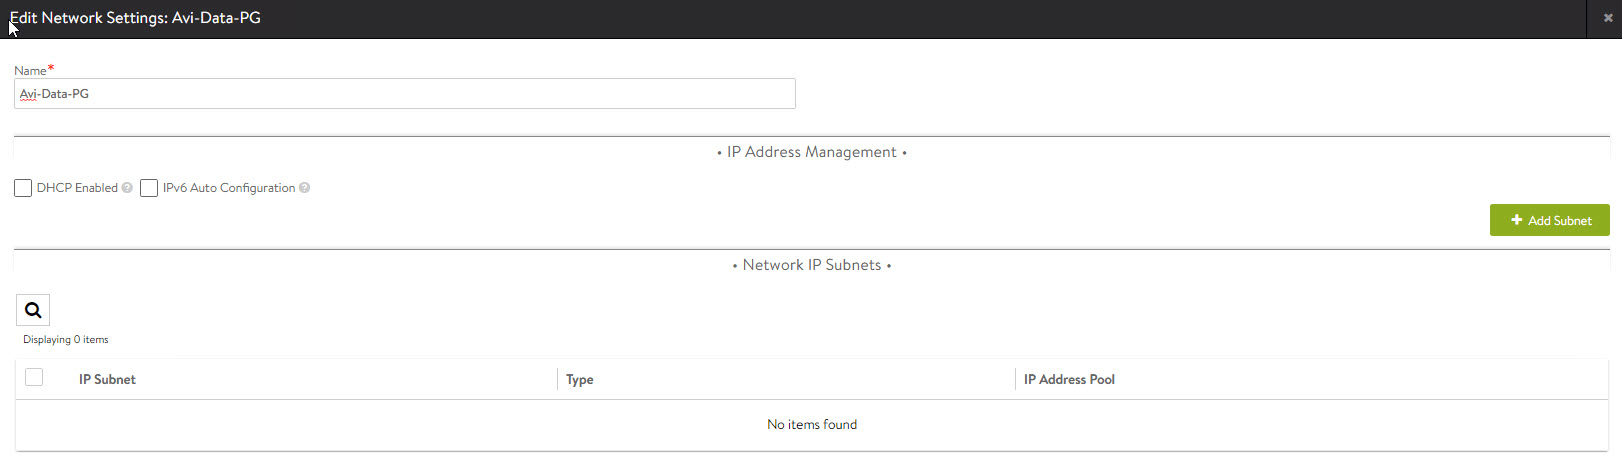
Click on the Add Subnet button.
Specify the subnet for Avi SE VIP and check “Use Static IP Address for VIPs and SE.”
Click on Add Static IP Address Pool and specify a pool of IP addresses that belongs to the SE VIP network.
Note: Ensure DHCP Enabled and Exclude Discovered Subnets are unchecked for Virtual Service Placement
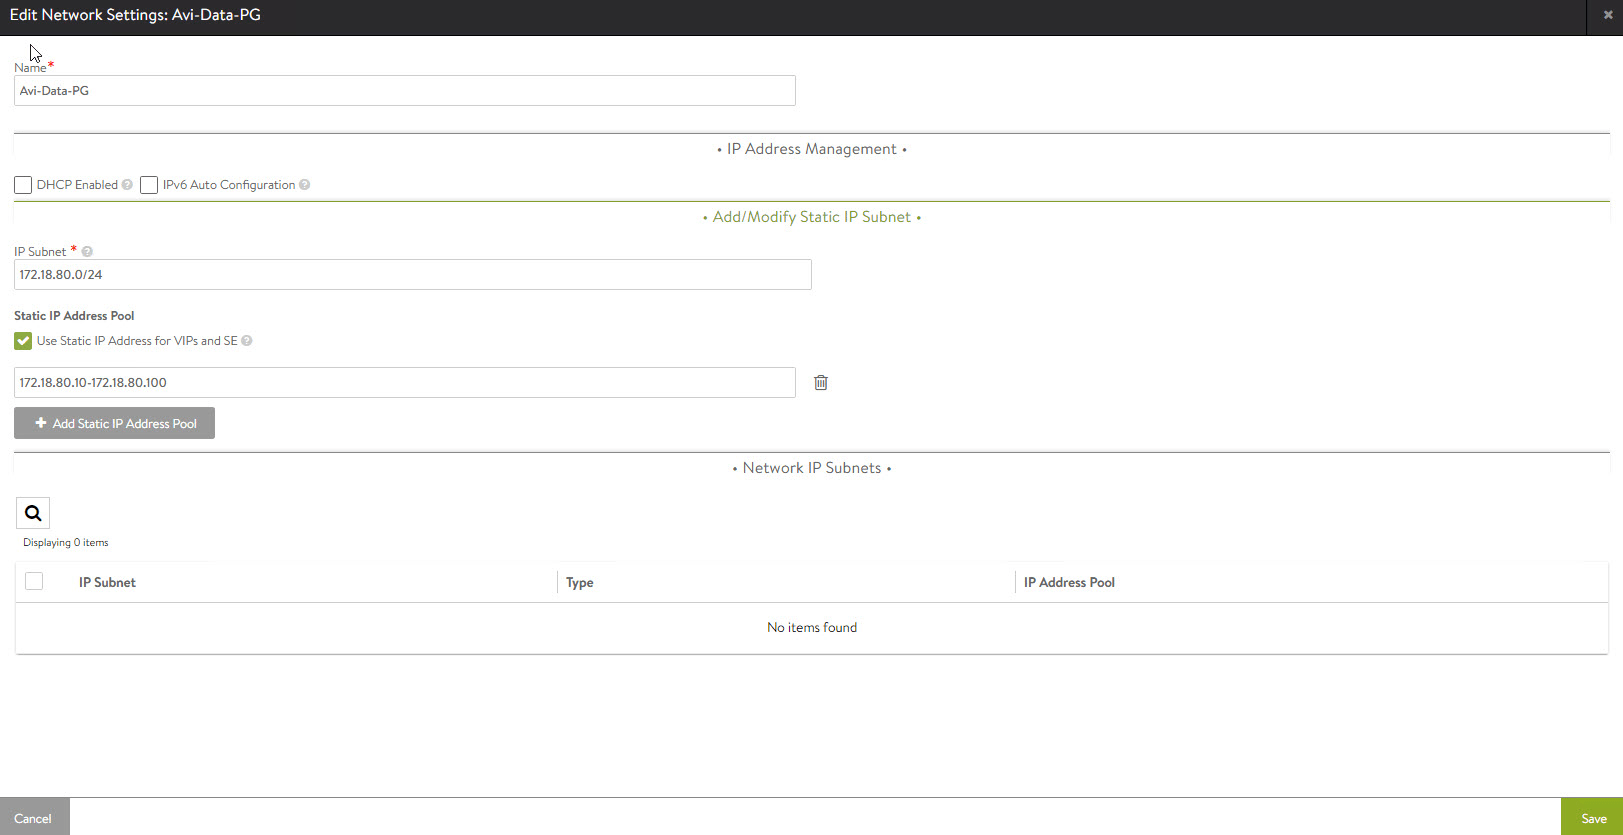
Hit Save to continue.
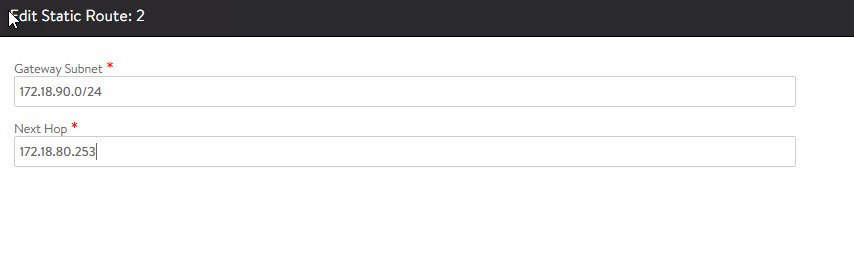
Configure Static Routes
Since the Tanzu Workload network is on a separate subnet from the SE VIP network, we need to configure a static route from the VIP network to the workload network so that SE VMs know how to reach the workload subnet.
To create static routes, navigate to Infrastructure > Routing > Static Route and click on Create.
First, we will specify the gateway subnet and next hop for the SE VIP network.
And that concludes this post. In the next post of this series, I will demonstrate the deployment of the Supervisor Cluster.
I hope you enjoyed reading this post. Feel free to share this on social media if it is worth sharing.