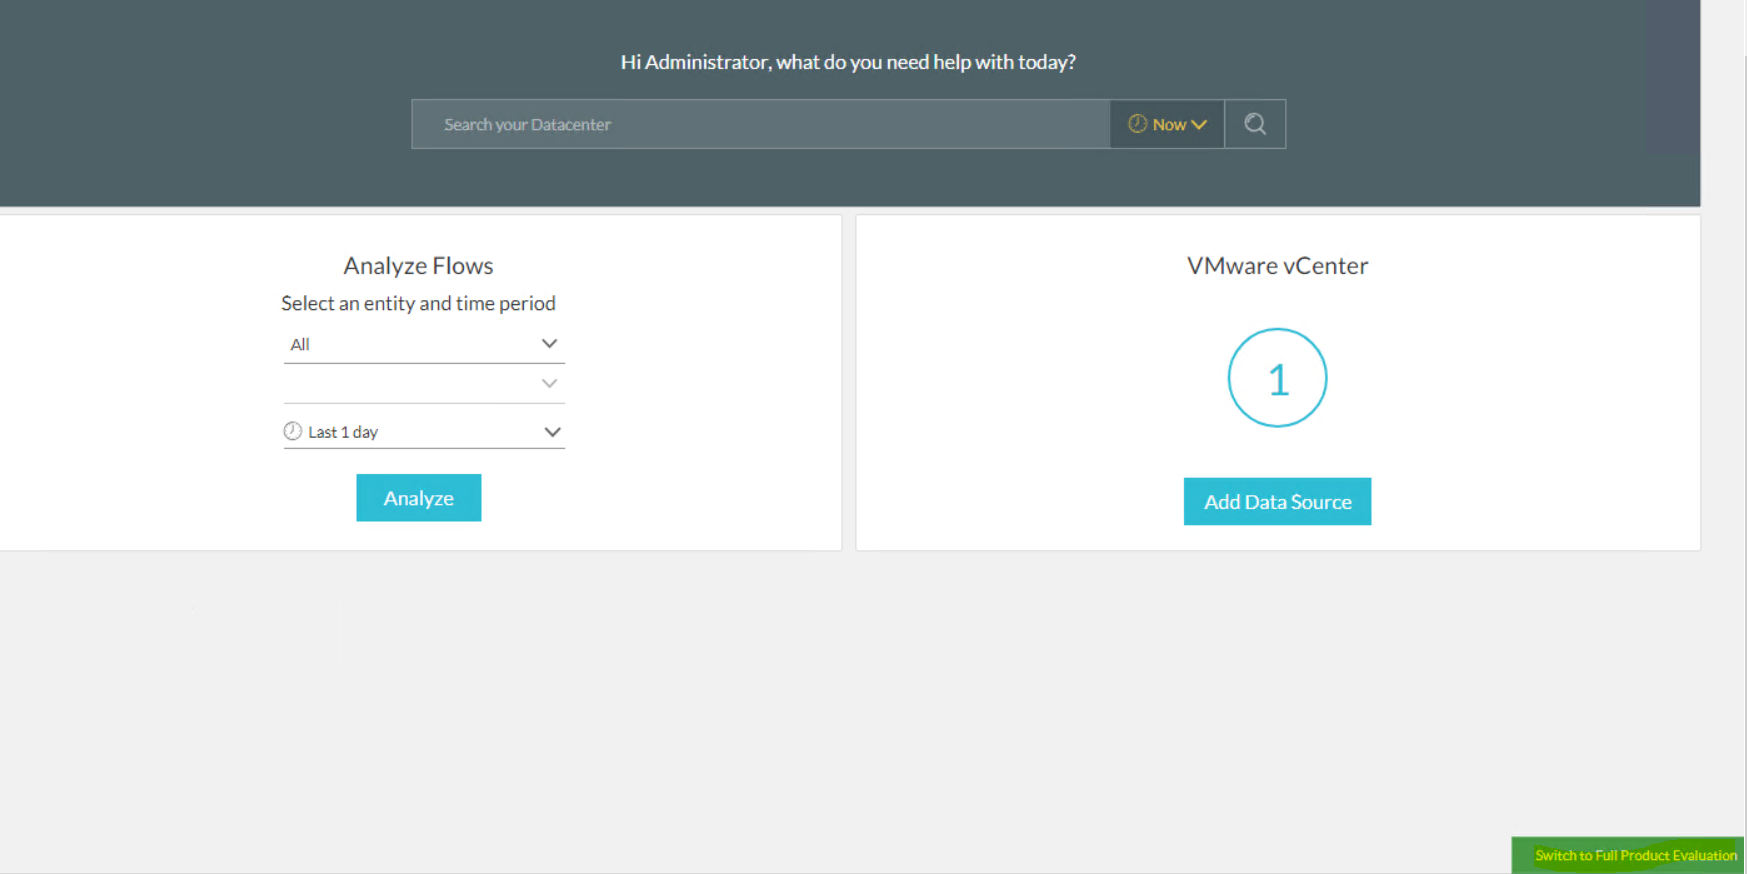
By default, when vRNI 3.9 is installed, itstarts in the NSX assessment mode, and in this mode, you will only see the option to add a vCenter server as a data source.
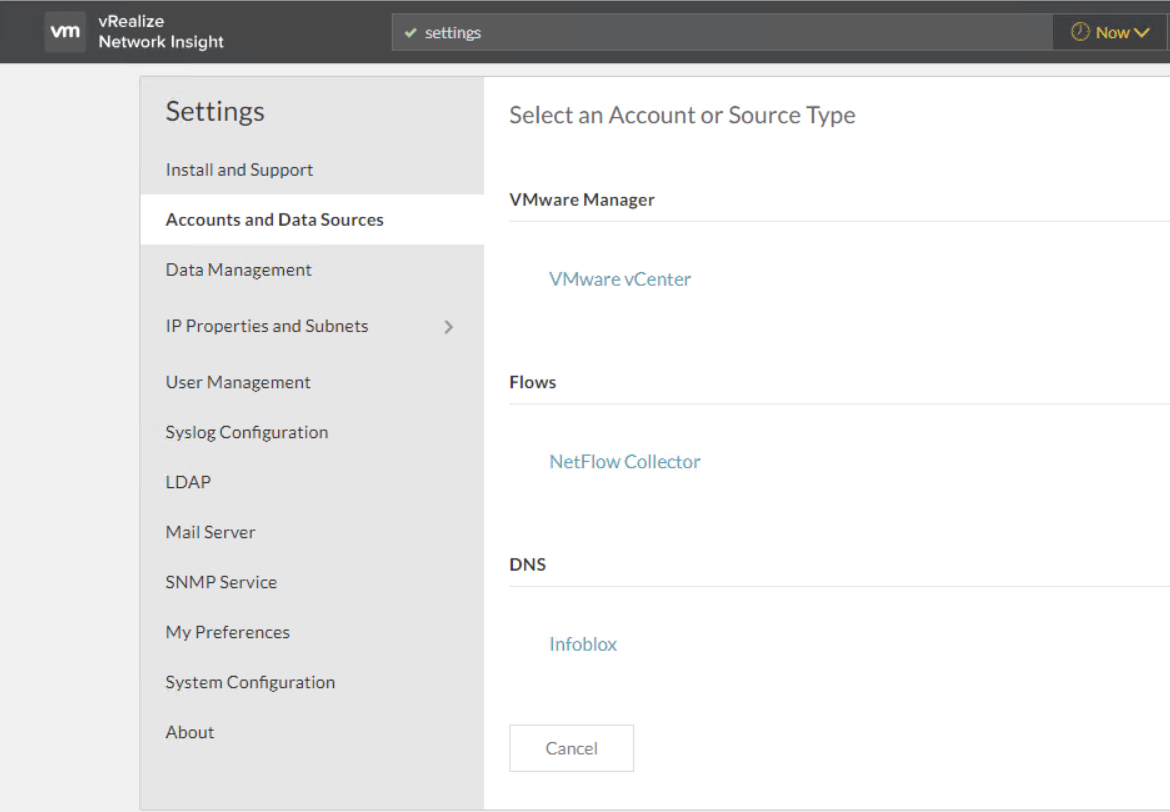
If you click on the Add Data Source, the only options available to you are vCenter, Infoblox, and Netflow Collector.
To add other data sources like NSX Manager or Cisco devices, you need to change the evaluation license and then click the “Switch to Full Product Evaluation” button in the bottom right corner of the vRNI homepage.
Once you have switched to full evaluation mode, you can add various data sources to analyze traffic flow and generate reports.
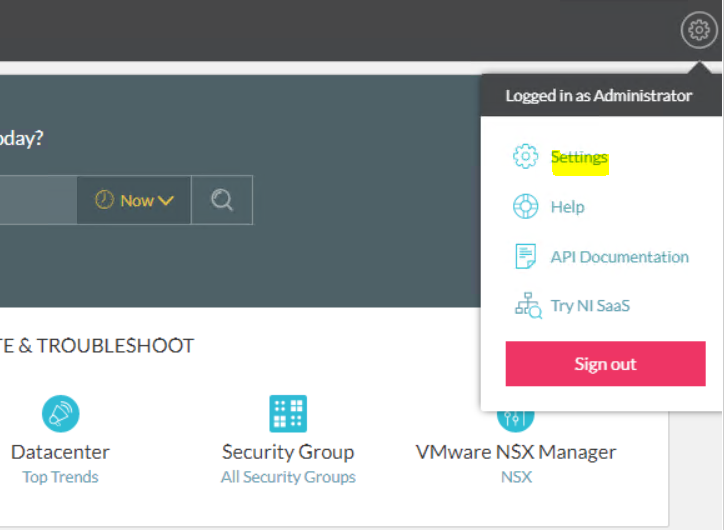
To add a new data source, go to the settings page from the gear icon menu and navigate to the Accounts and Data Sources option.
Click on the Add Source button.
You will see options to add various types of data sources.
Click on VMware vCenter to add vCenter to vRNI.
Select the Proxy VM from the list and provide the IP/FQDN for the target vCenter and the credentials using which vRNI will communicate with the vCenter.
Optionally you can also enable Netflow on the vCenter.
Click the Submit button, and the newly added vCenter will be visible in the list.
Add NSX Manager
Click on Add Source button againand select VMware NSX Manager from the list.
Again, select the appropriate Collector VM and the NSX Manager IP/FQDN and credentials to help connect vRNI with NSX.
Click on the Validate button to ensure the provided credentials are valid and vRNI can communicate with NSX Manager.
You can also chose to collect data from the NSX Controllers and optionally you can enable Edge data collection and IPFIX.
Hit submit button to complete the Add NSX Manager wizard.
Let vRNI collect data for 24 hours or so and then you can view the alerts and any configuration issue popping up in vRNI dashboards.
And that’s it for this post. We will learn about vRNI more in the upcoming post of this series.
I hope you enjoyed reading this post. Feel free to share this on social media if it’s worth sharing.


