
In the last post of this series, I discussed vCloud Extender architecture and its capabilities. In this post, I will walk through the steps of configuring vCloud Extender on the cloud provider side.
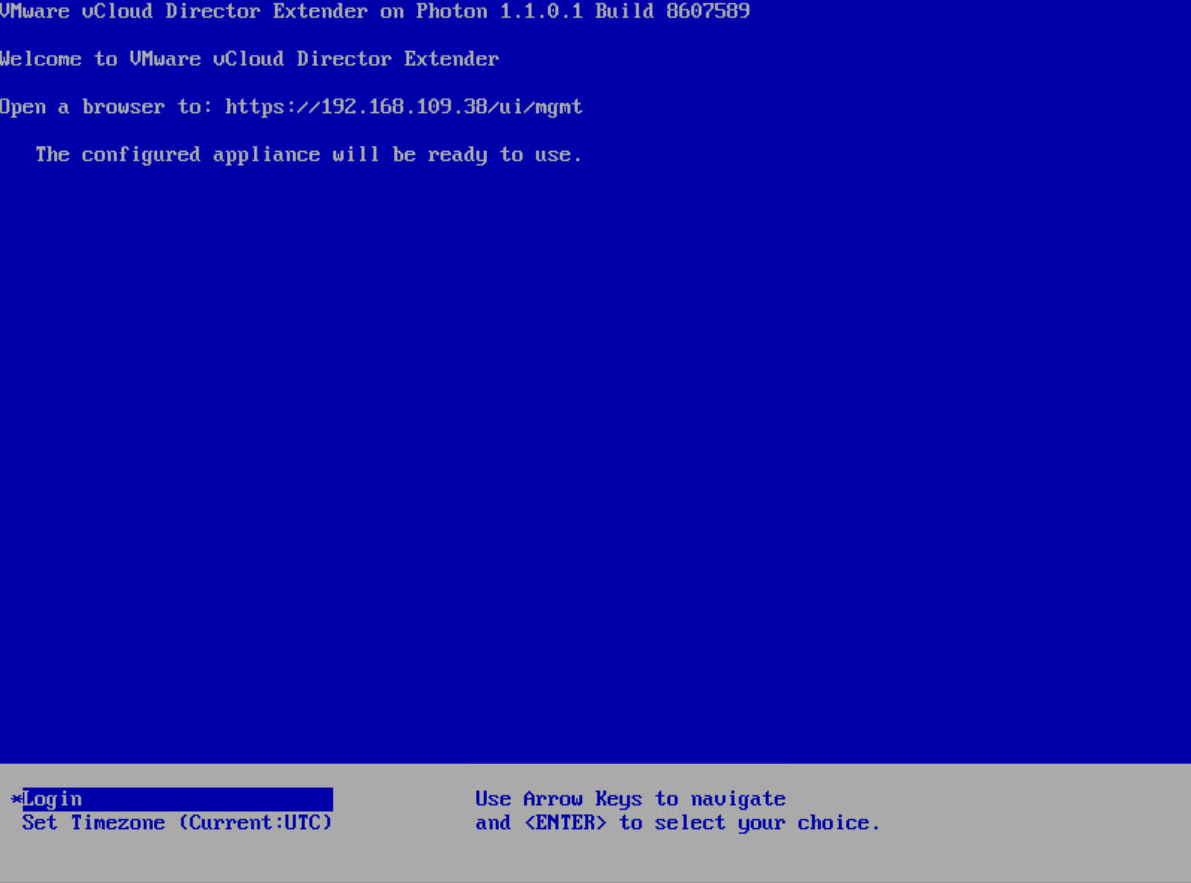
vCloud Extender is deployed as an OVA, and deployment steps are straightforward, as shown in the slideshow below. Select the deployment type as “cx-cloud-service” on the template customization page.

Once the appliance is deployed and boots up, it will show the browser link to access the appliance for further configuration.
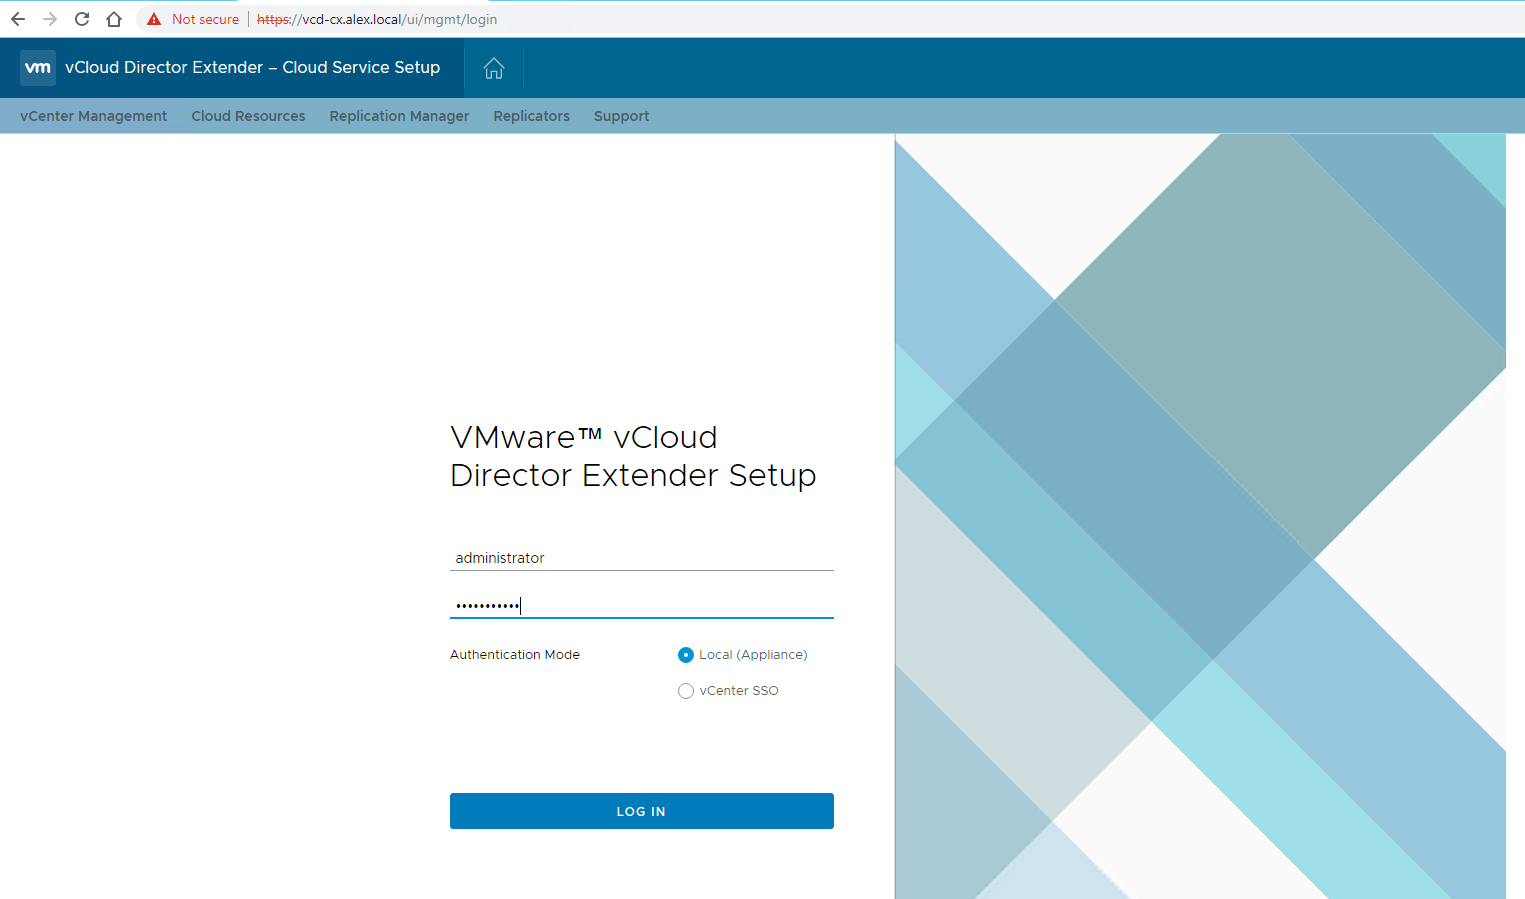
Connect to the appliance by typing https://appliance-fqdn/ui/mgmt and login with the administrator credentials.
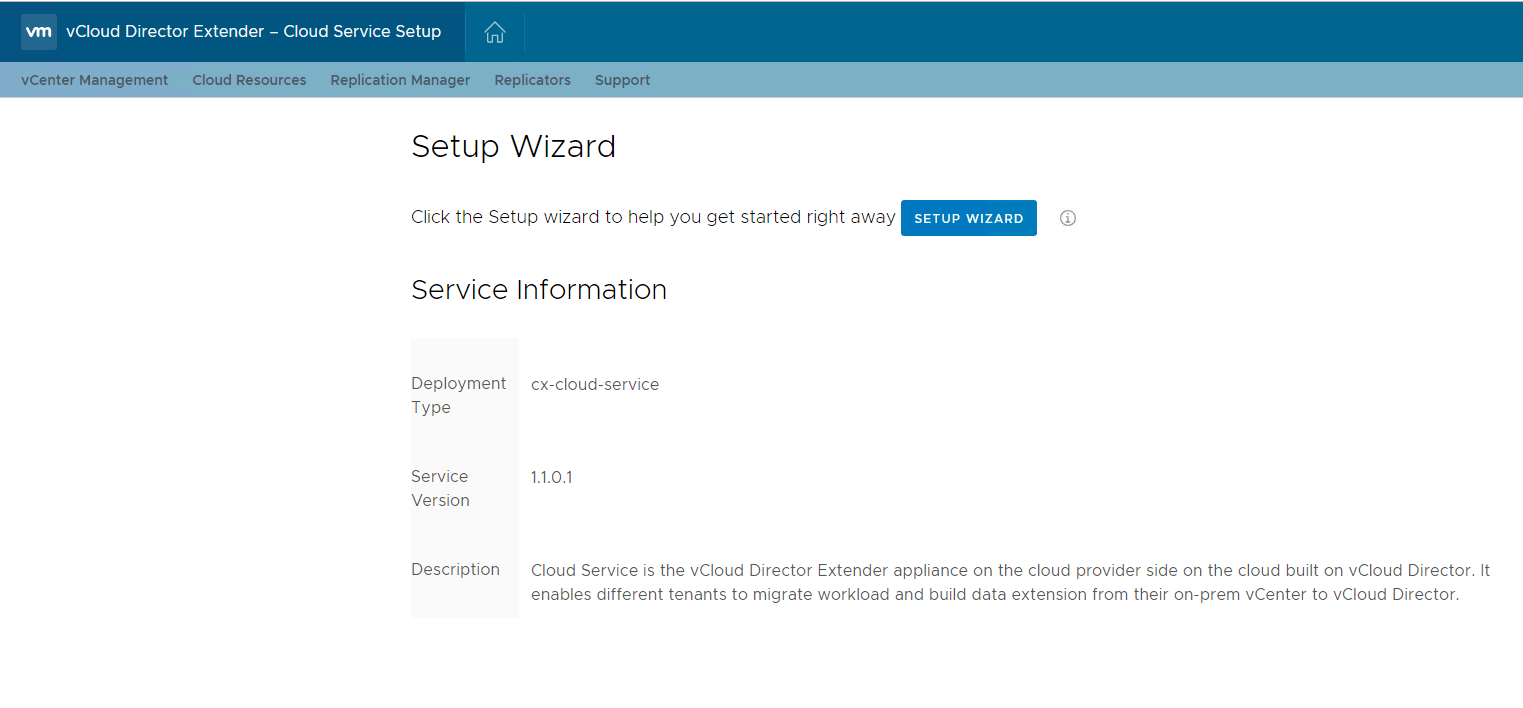
Click on Setup Wizard to start configuring the CX Cloud Service appliance.
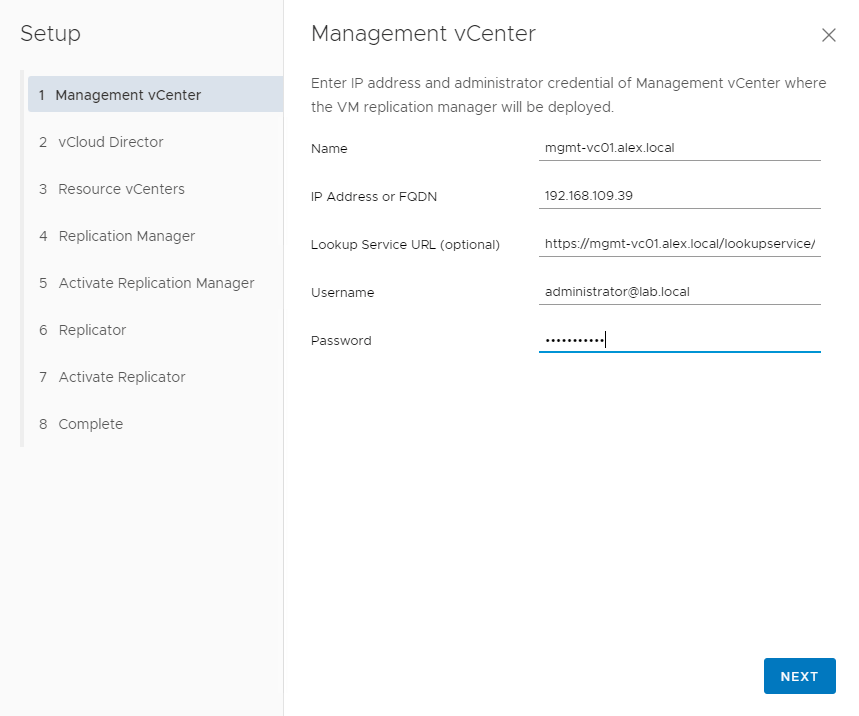
Register the appliance with your management vCenter. If your environment has PSC external to VC, use the PSC IP/FQDN for the lookup service URL.
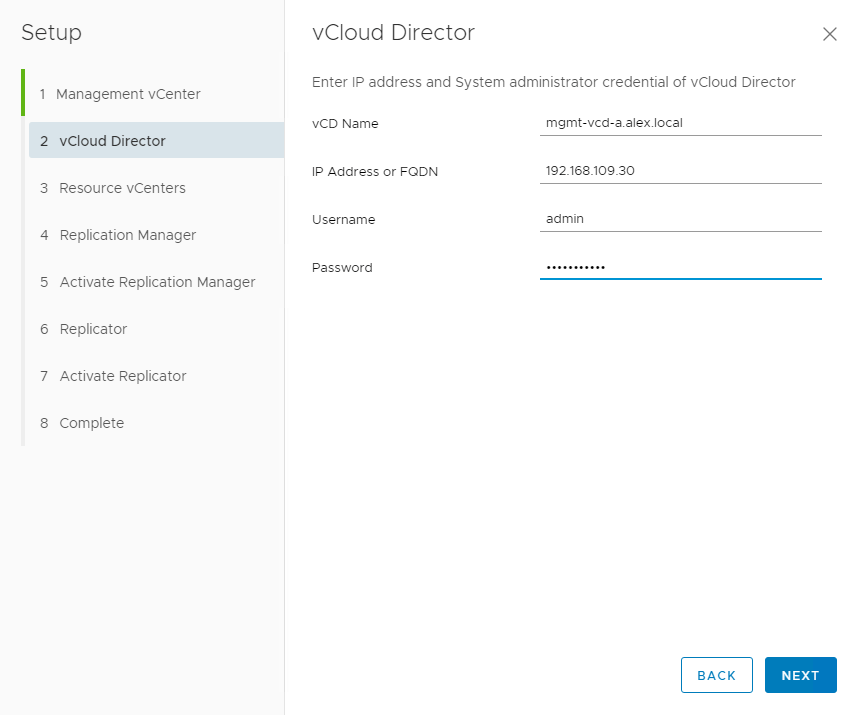
Register the CX Cloud appliance with the vCloud Director. Enter your vCD details and administrator credentials.
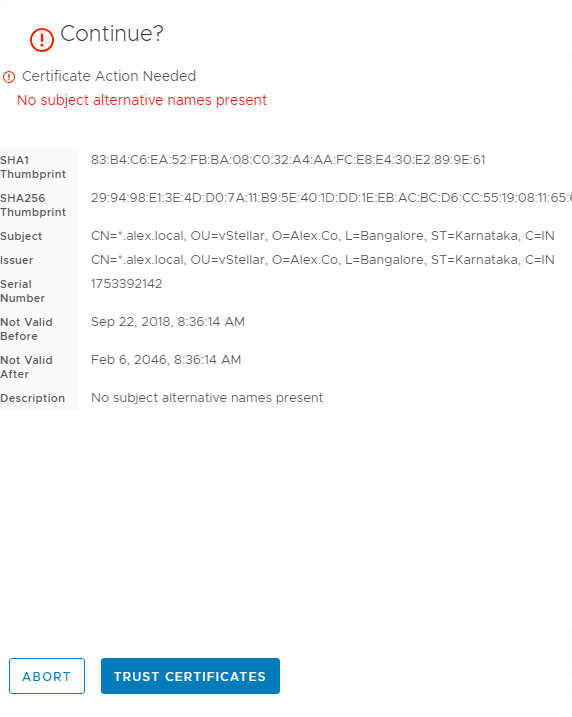
Accept the vCD SSL certificate.
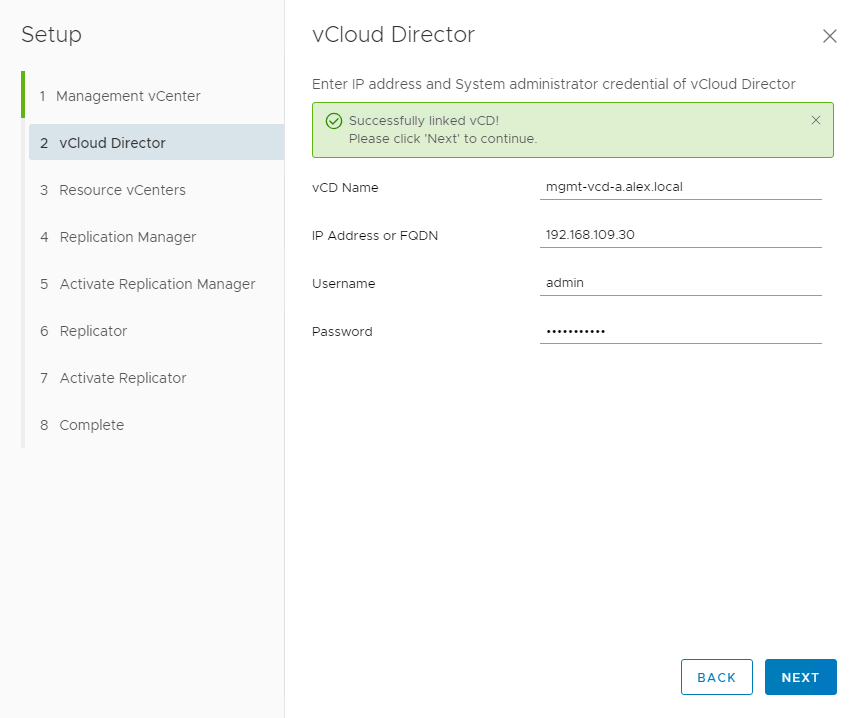
Proceed to the Next step once vCD is successfully linked to the CX-Cloud appliance.
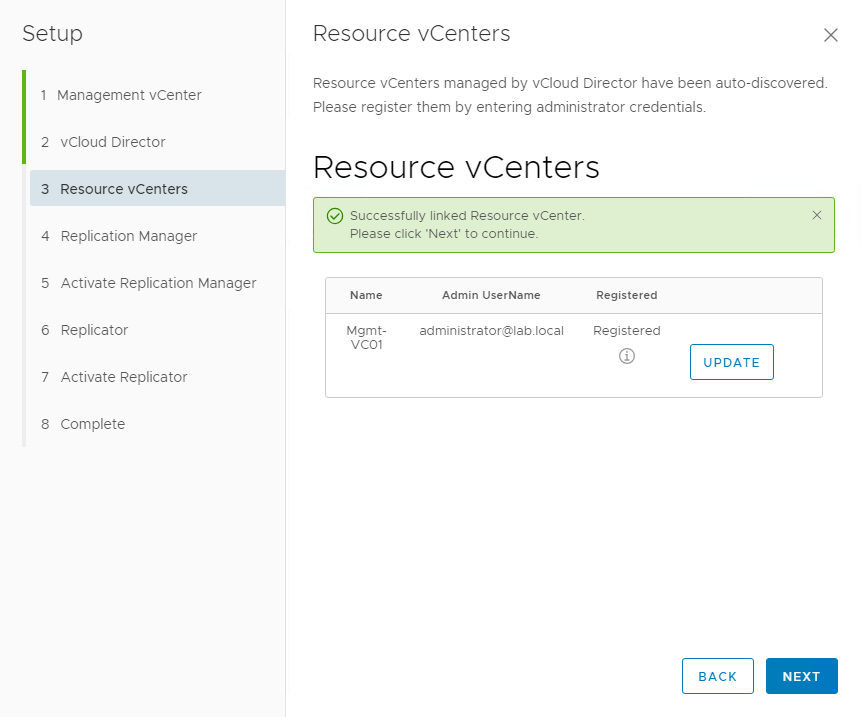
The next step is to link the resource vCenter. This VC is the one that is registered in your vCD and provides compute resources to your cloud infrastructure.
Note: For Lab/POC deployments, management and resource vCenter can be the same.
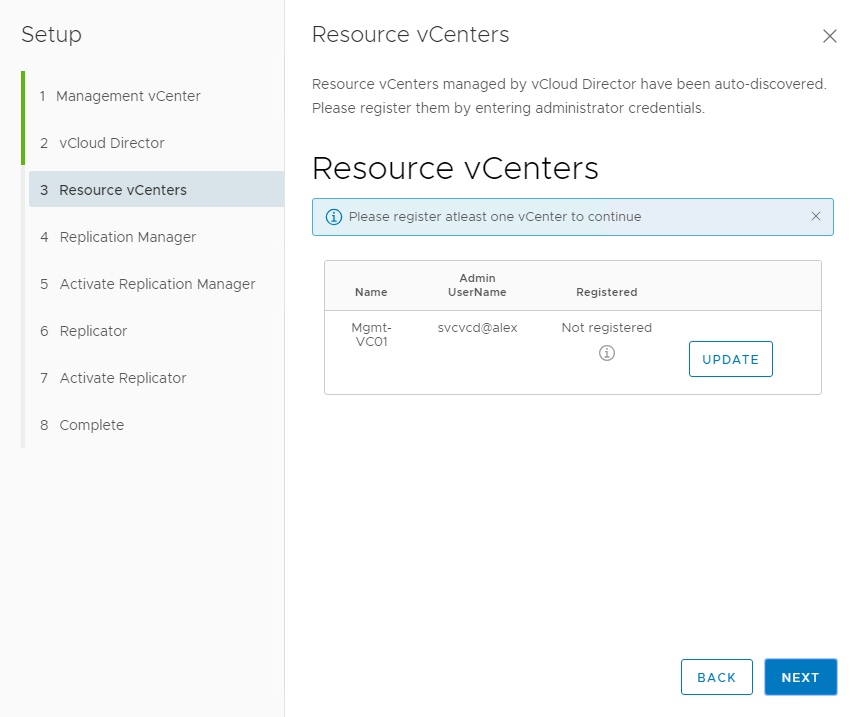
Click on the update button and enter the details of the Resource VC lookup service.

On successful registration, the Resource VC status shows as Registered.
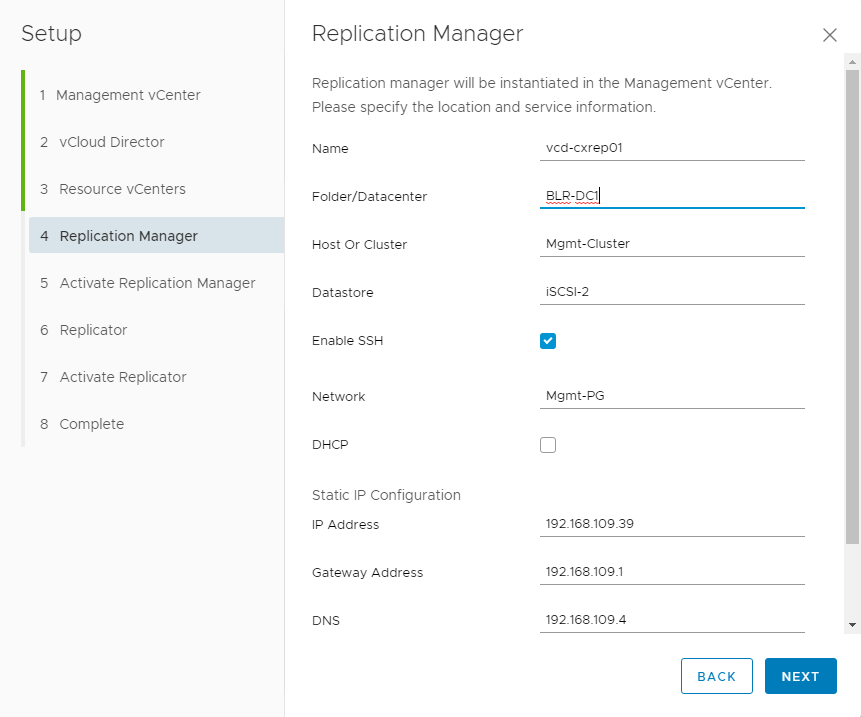
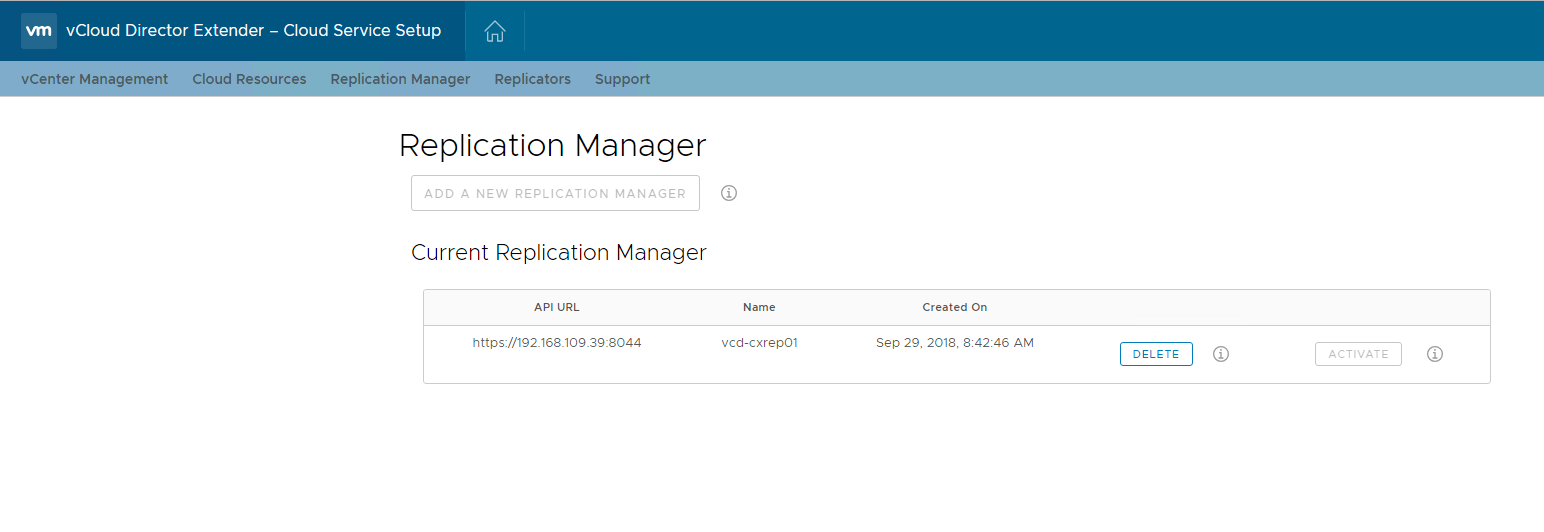
On the Replication Manager page, enter details of your Datacenter/Cluster and hostname/IP details for the manager appliance. After entering the details, click the Next button. The deployment of the Replication Manager appliance will be kicked off via ovftool.
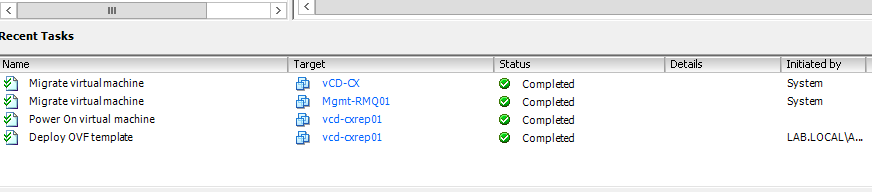
Once the replication manager appliance is deployed and boots up, you will see a message “Successfully created Replication Manager”.
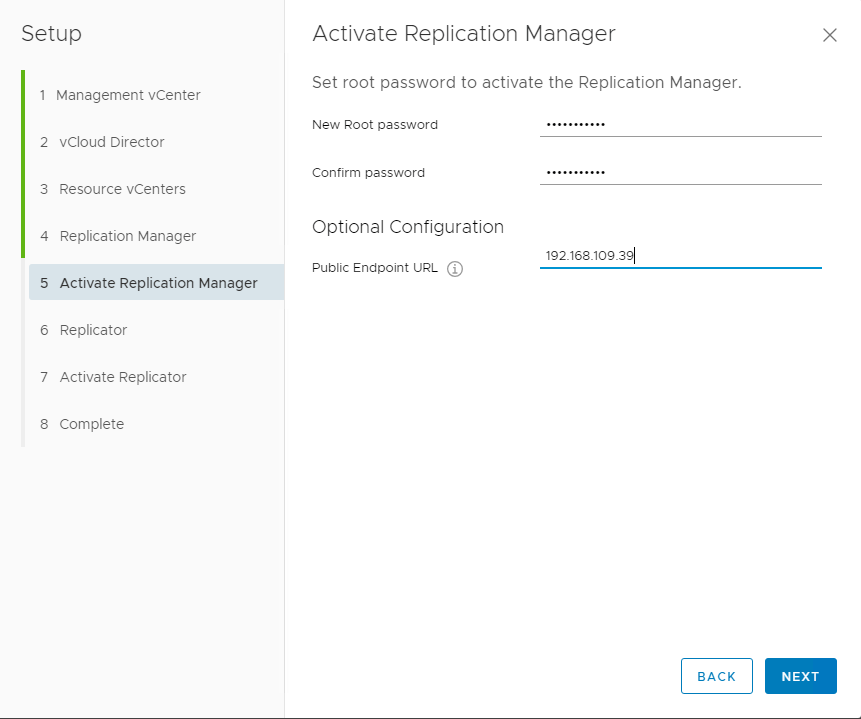
Click Next to go to the Activate Replication Manager Page and set the root user credentials and Public IP details.
Note: The external (public) IP address is the address to which tenants connect their on-prem appliances. Append port 8044 after entering the IP address.
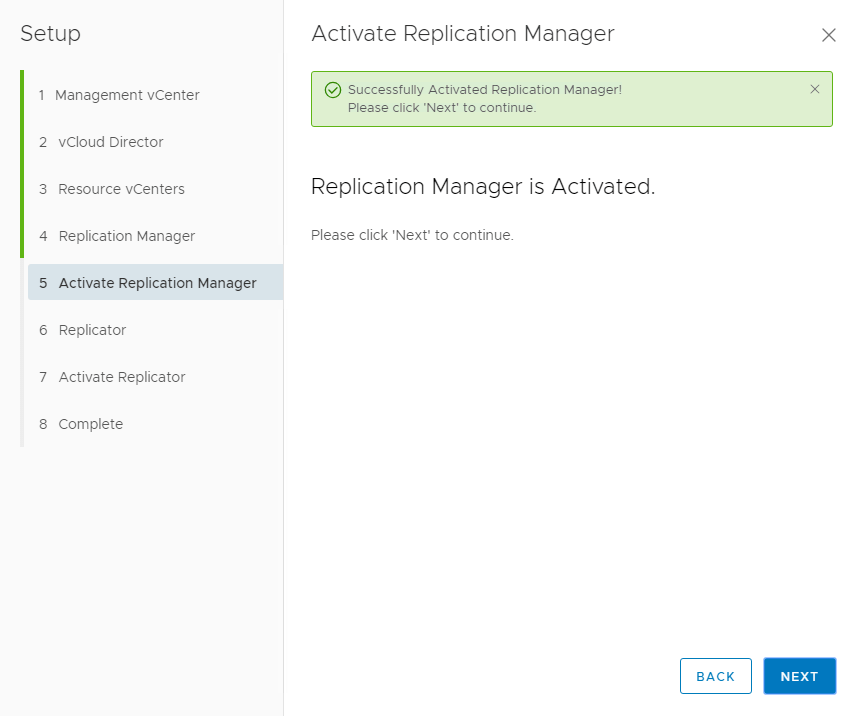
Hit Next when Replication Manager is Activated.
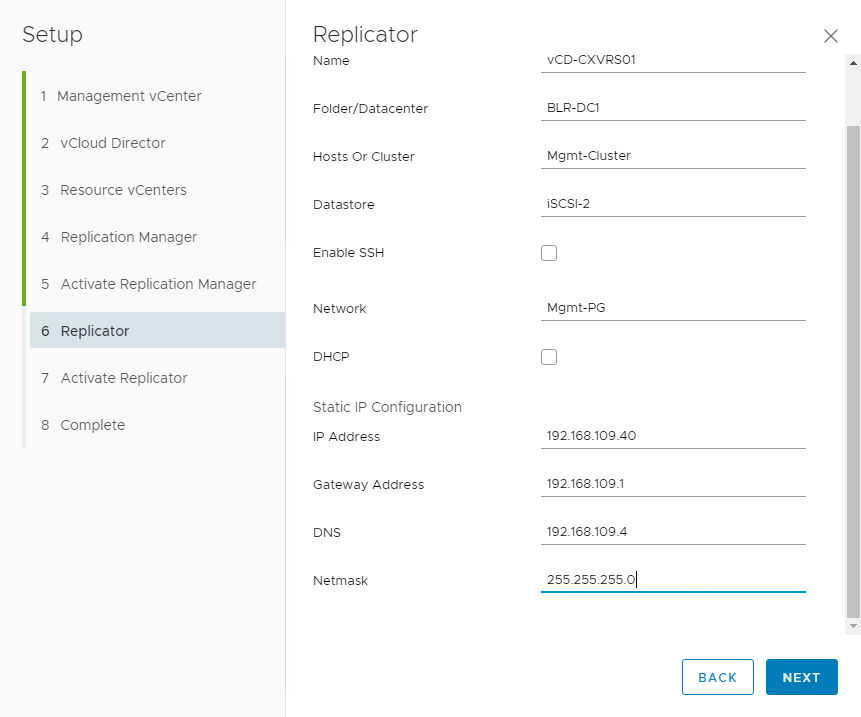
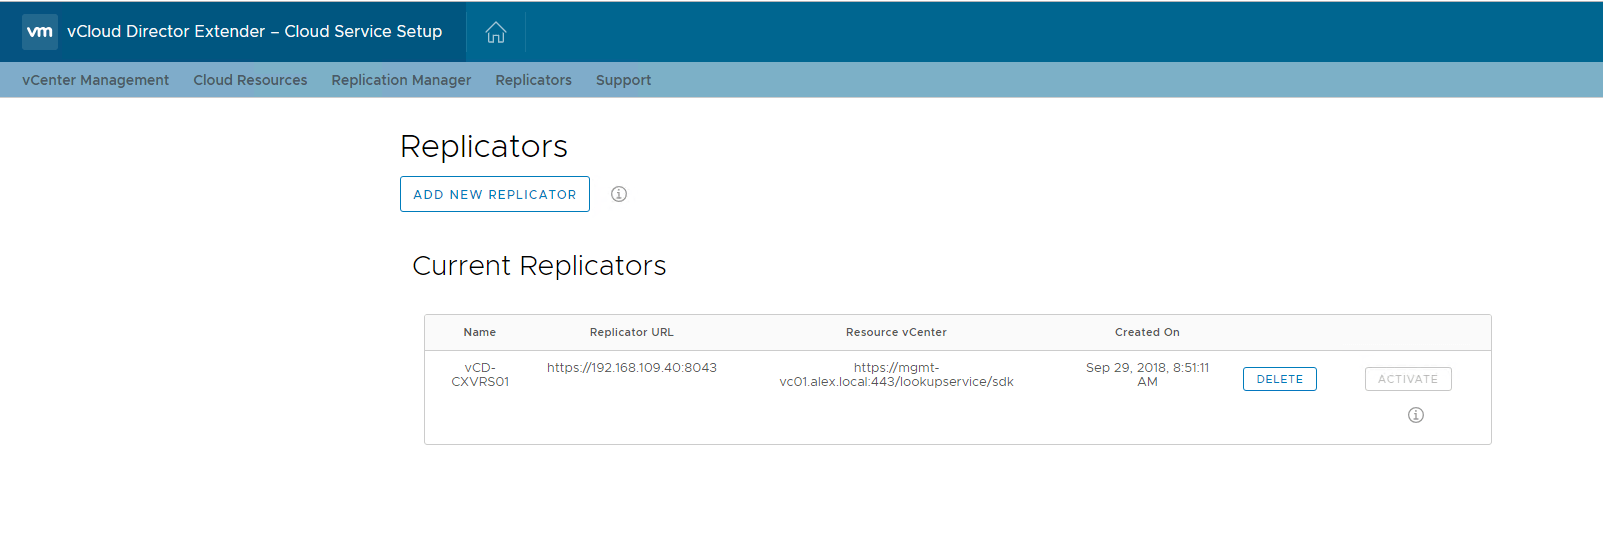
On the Replicator page, enter hostname/IP, Portgroup, Datacenter, and Cluster details.
Once again, a new appliance will be deployed using the above details.
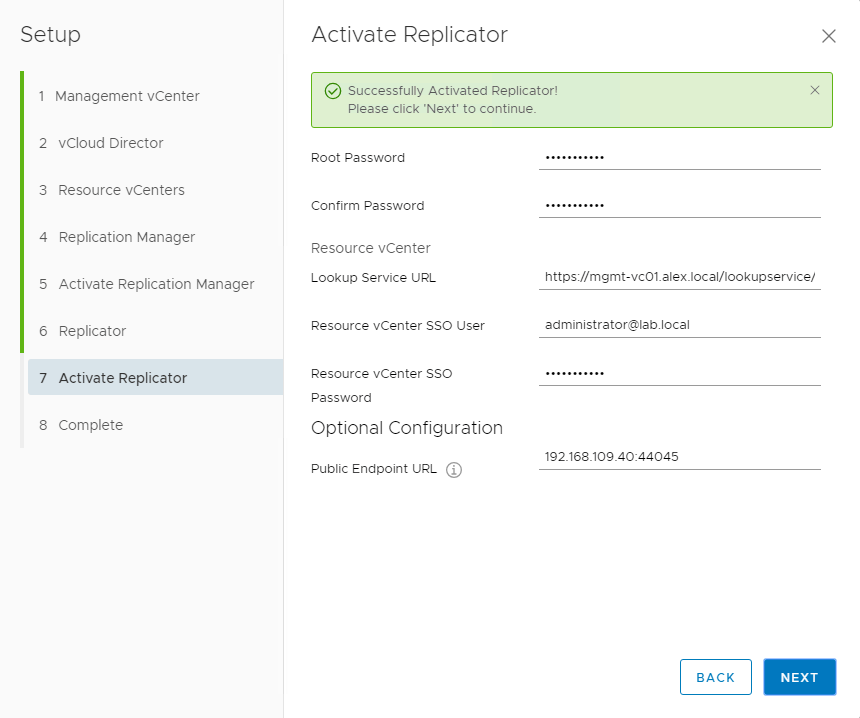
After the appliance boots up and is configured, go to the Activate Replicator page and enter root credentials for this appliance and the lookup service details.
Also, set the Public Endpoint URL.
Note: You can use the same public IP for specifying the endpoint url for both the replication manager and the replicator appliance, or different IPs.
In my lab, I am using a local IP as both on-prem and cloud sites are locally connected.
Hit Finish on the ‘Complete’ screen to finish the service provider side configuration.

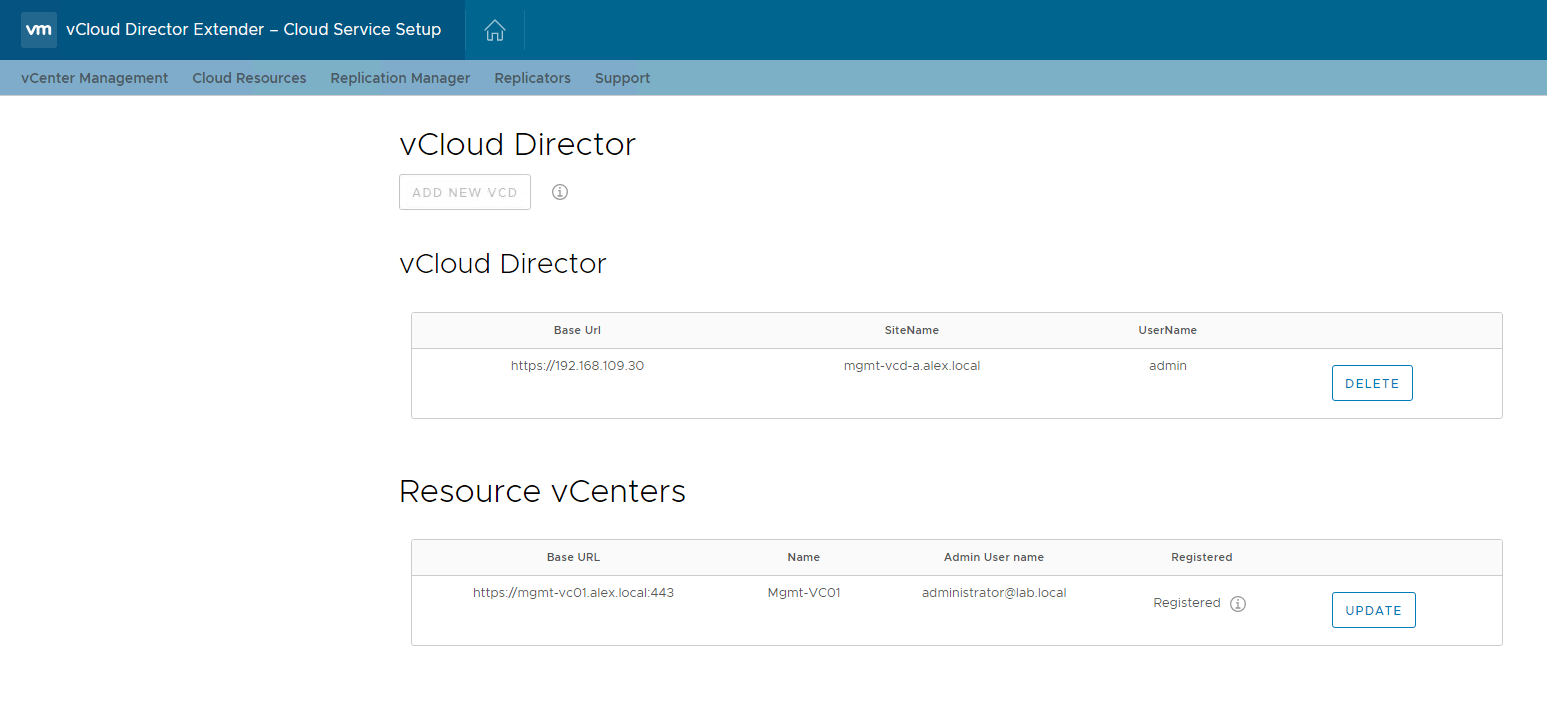
Navigating through the tabs in the management UI will show that all the required components are now deployed and registered.
We have now completed the appliance configuration on the service provider side. The next step is to configure NAT/Firewall rules so that tenants can connect to your new cloud service.
Note: If you are using a single Public IP for your entire vCloud Extender service, the Firewall/NAT configuration is a bit tricky. The spreadsheet below can help you in creating what rules you need in case of a single public IP.

In case outbound internet traffic from your vCloud Extender network is blocked on the firewall, you need to open the following traffic in the Outbound direction.

And that’s it for this post.
I hope you enjoyed reading this post. Feel free to share this on social media if it’s worth sharing.