
In last post of this series, we discussed about architecture and components of Zerto and we talked about few roles and responsibilities that zerto virtual manager (ZVM) is accountable for. In this post we will learn how to deploy and do basic configuration of ZVM.
Before we move ahead, lets quickly recap what exactly ZVM is responsible for. The main function of ZVM are:
- It manages everything required for replication between the protected and recovery site. The actual replication of data is done by VRA though.
- It interacts with vCenter Server or SCVMM to get the inventory of VM’s, disk size, network settings and host details etc.
- It monitors changes in VMware environment and responds to that changes, for example, when a protected VM is migrated from one host to another, ZVM intercepts this change and updates this info in the ZVM portal.
Lab Design
Below diagram (not a great one) shows high level overview of components used in my lab. I have 2 sites which are connected via WAN link. I have vCenter server and ZVM deployed on both sites.
On each esxi host, one VRA appliance is sitting and each host have few test VM’s running.
Esxi and vCenter are at v6.0 and Zerto at 5.5

Installation Requirements for ZVM
- Windows Server 2008 R2 SP1 and higher (64-bit)
- .NET Framework 4.5.2 or higher
- Minimum 2 CPU and 4GB RAM
- VMware vCenter/ESXi 5.5 or higher
- MSSQL Database (express or external)
In my lab I am installing ZVM inside a 64 bit Server 2012 VM which has 2 vCPU and 4 GB RAM. This windows server is connected to same network on which vCenter server and all my Esxi host resides.
Lets dive into lab now and start the installation process.
1: Launch the Zerto for VMware vSphere Installer.

2: Accept EULA and hit Next.

3: Hit next to continue with default installation directory or if you want to change it, change it here.

4: For lab deployment Express Installation is sufficient. I just wanted to check what are the various options available in the installation wizard, so I chose Custom installation.

5: Since this is lab deployment, I am going ahead with embedded database which is nothing but MSSQL Server express edition.

6: Provide the details of vCenter server with which this ZVM will be associated. As a best practice, use a dedicated service account for zerto> vCenter communication.

7: I have a vCD deployed in my lab, but I am not selecting it as of now. Will try this later once I am comfortable with basics of zerto.

8: Provide details for the site where ZVM is getting installed. Provide the details which makes more sense to you.

9: Select the IP/hostname for the ZVM and leave the default port configuration as it is.

10: Zerto Online Service is similar to VMware CEIP and I am not selecting it to send any anonymous data to zerto.

11: Installer will run pre-check to ensure all installation requirements are met and vCenter connectivity is OK. If any check fails here, remediate the issue and click on RECHECK.
Once you see all green here, click on RUN to kickoff the installation.

12: Wait for few minutes for installation to complete.

13: Select the open ZVM interface option and clcik on DONE.

14: Default URL to access ZVM interface is https://ZVM-FQDN:9669/zvm
Login with username and password which you provided during installation. Typically its the account via which you have logged in to windows server where you installed ZVM.

15: Provide the license key and hit START button.

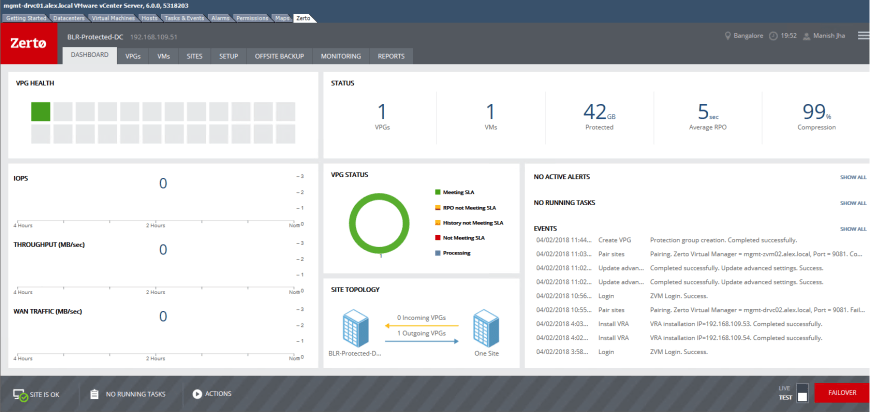
16: And this is the welcome dashboard which you will see on first login.

17: Navigate to setup tab to see the info of installed VRA. Since this is brand new environment, there is no VRA installed yet. We will cover VRA installation in next post of this series.

Also in vSphere C# client you will see a plugin for Zerto is installed. If you are already connected to vCenter via thick client, disconnect and reconnect to verify zerto plugin is present there. It basically shows the same dashboard that we saw when we first logged into ZVM interface.
And with this we have finished the ZVM installation. For vCenter to vCenter replication, we need to deploy ZVM at both protected and recovery site.
I hope you find this post informational. Feel free to share this on social media if it is worth sharing. Be sociable 🙂